The legendary Suncom TAC-2

Among those who grew up playing with Commodore C64s, Sinclair ZX Spectrums, Amigas and Atari STs - computers that all shared the ubiqutous DB9 joystick port - a common sentiment is that two models of joysticks were above all others. One is the Competition Pro, which is still available to buy as a brand new reproduction. For those who didn’t like the noise or feel of microswitches used on the Competition Pro, the joystick of choice was usually the Suncom TAC-2.
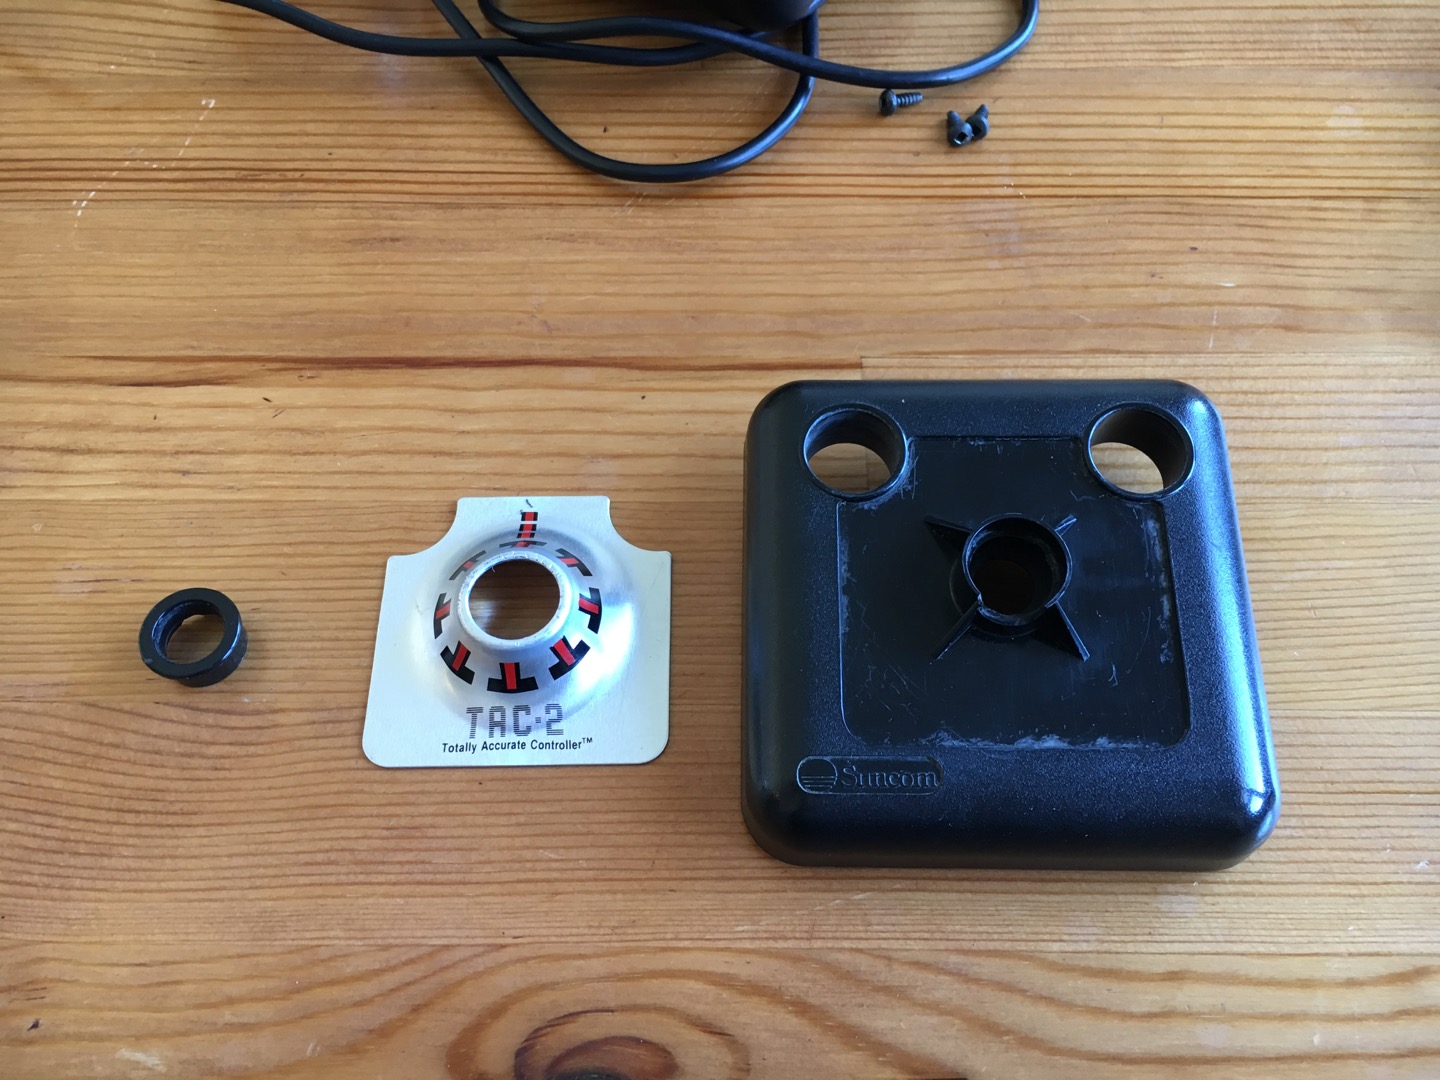
Given that the TAC-2 has been out of production for a long time already, even second-hand examples command a fairly high price on the market. Those looking to purchase some for use with their retro computers, here’s a quick introduction to the TAC-2 and how to fix some of the typical problems encountered with these joysticks.
The three most commonly seen models of the TAC-2 are:
- The normal black model, made in USA
- The beige special edition model, made in USA
- The cost-reduced black model, made in China
The two black models look initially very similar on the outside, although there are some ways to identify them apart - the obvious method being looking at the bottom to read which is the country of manufacture.
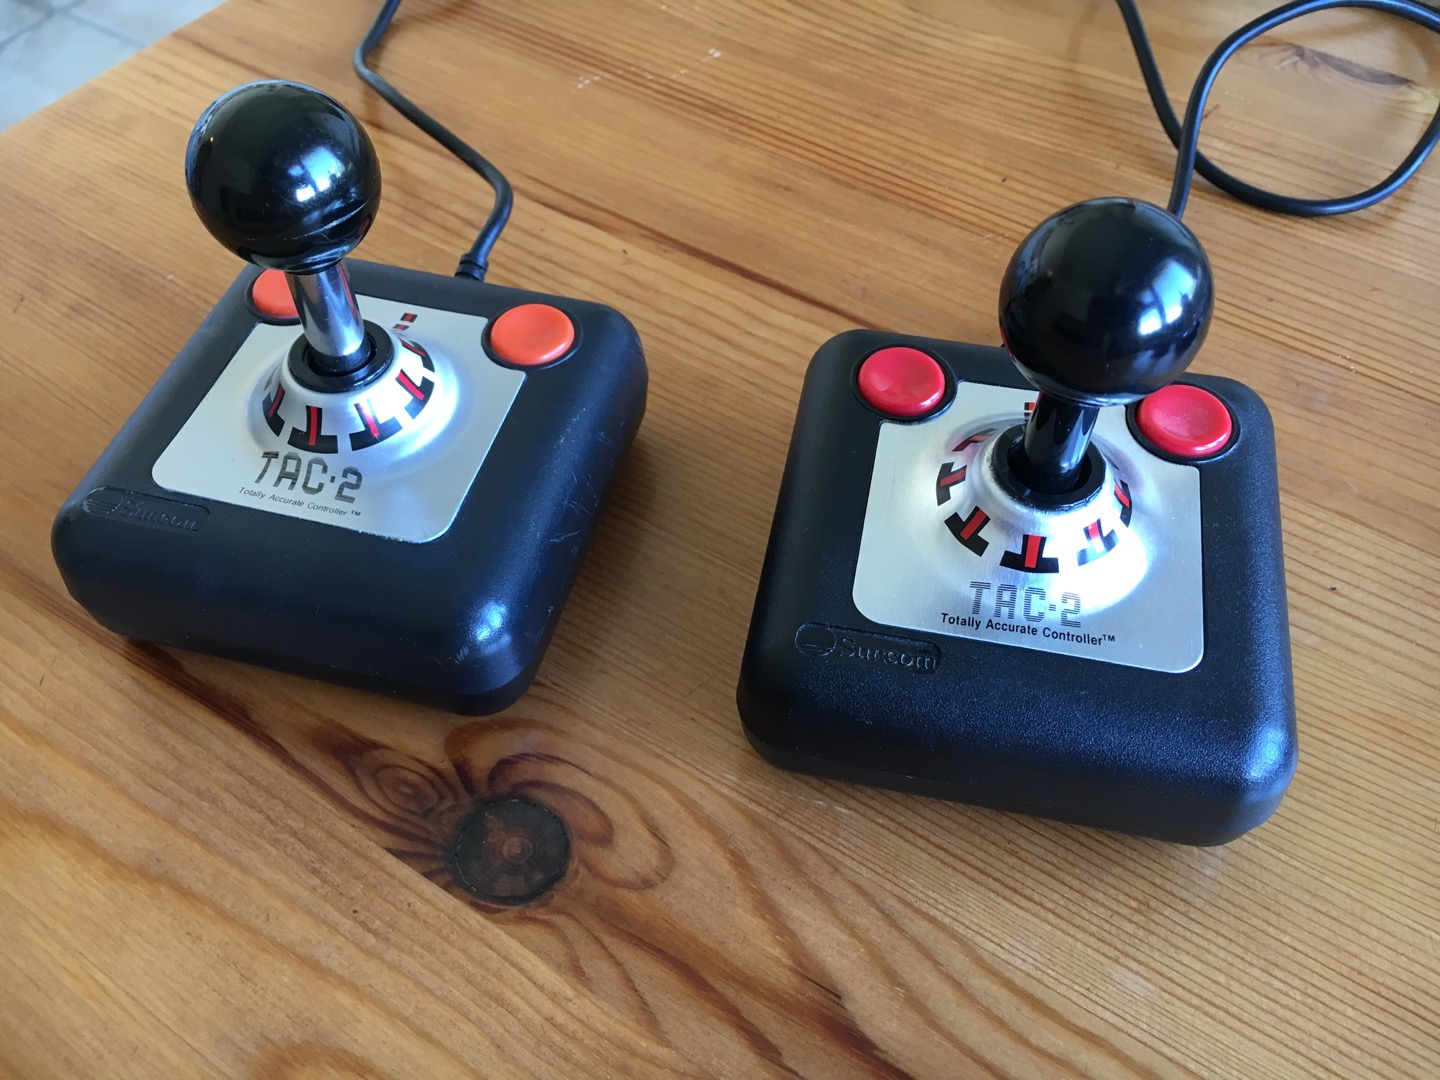
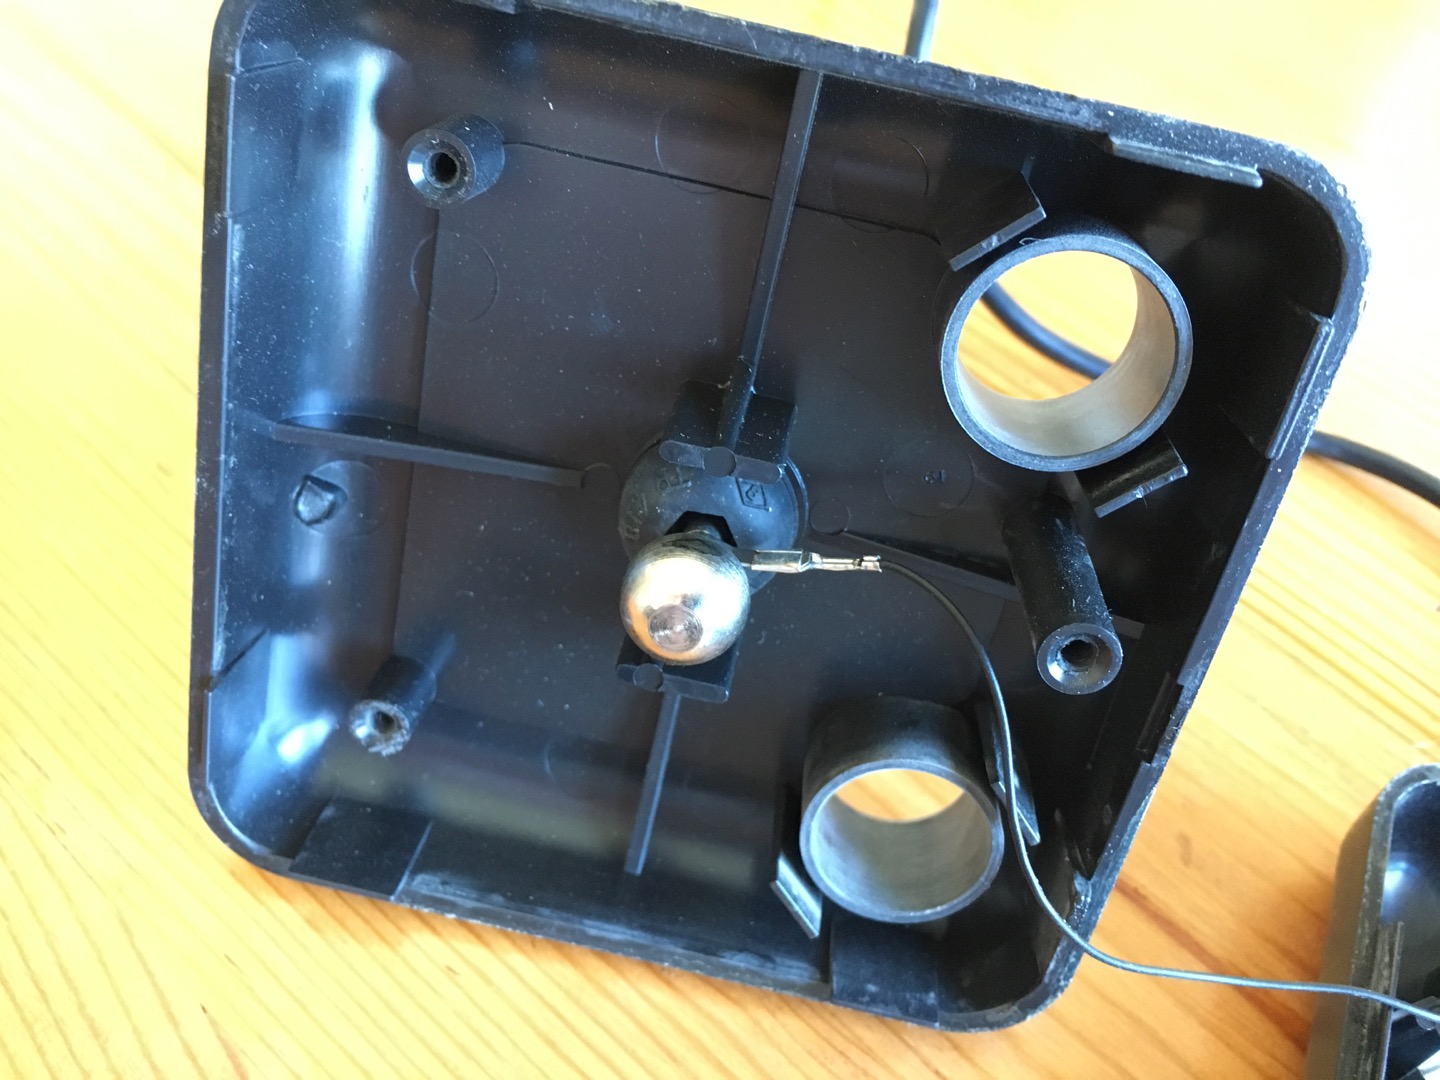
A very reliable way to identify the model is by looking at the part of the stick visible under the knob. On the US-manufactured models it is always metallic chrome, whereas on Chinese models it is black plastic. US models also have orange fire buttons compared to the Chinese ones which have red buttons.
Chinese models also appear to use normal Philips-head screws instead of those annoying square head ones. Granted, the latter ones are fairly easy to turn by sticking a conveniently-sized flat screwdriver diagonally into the square.
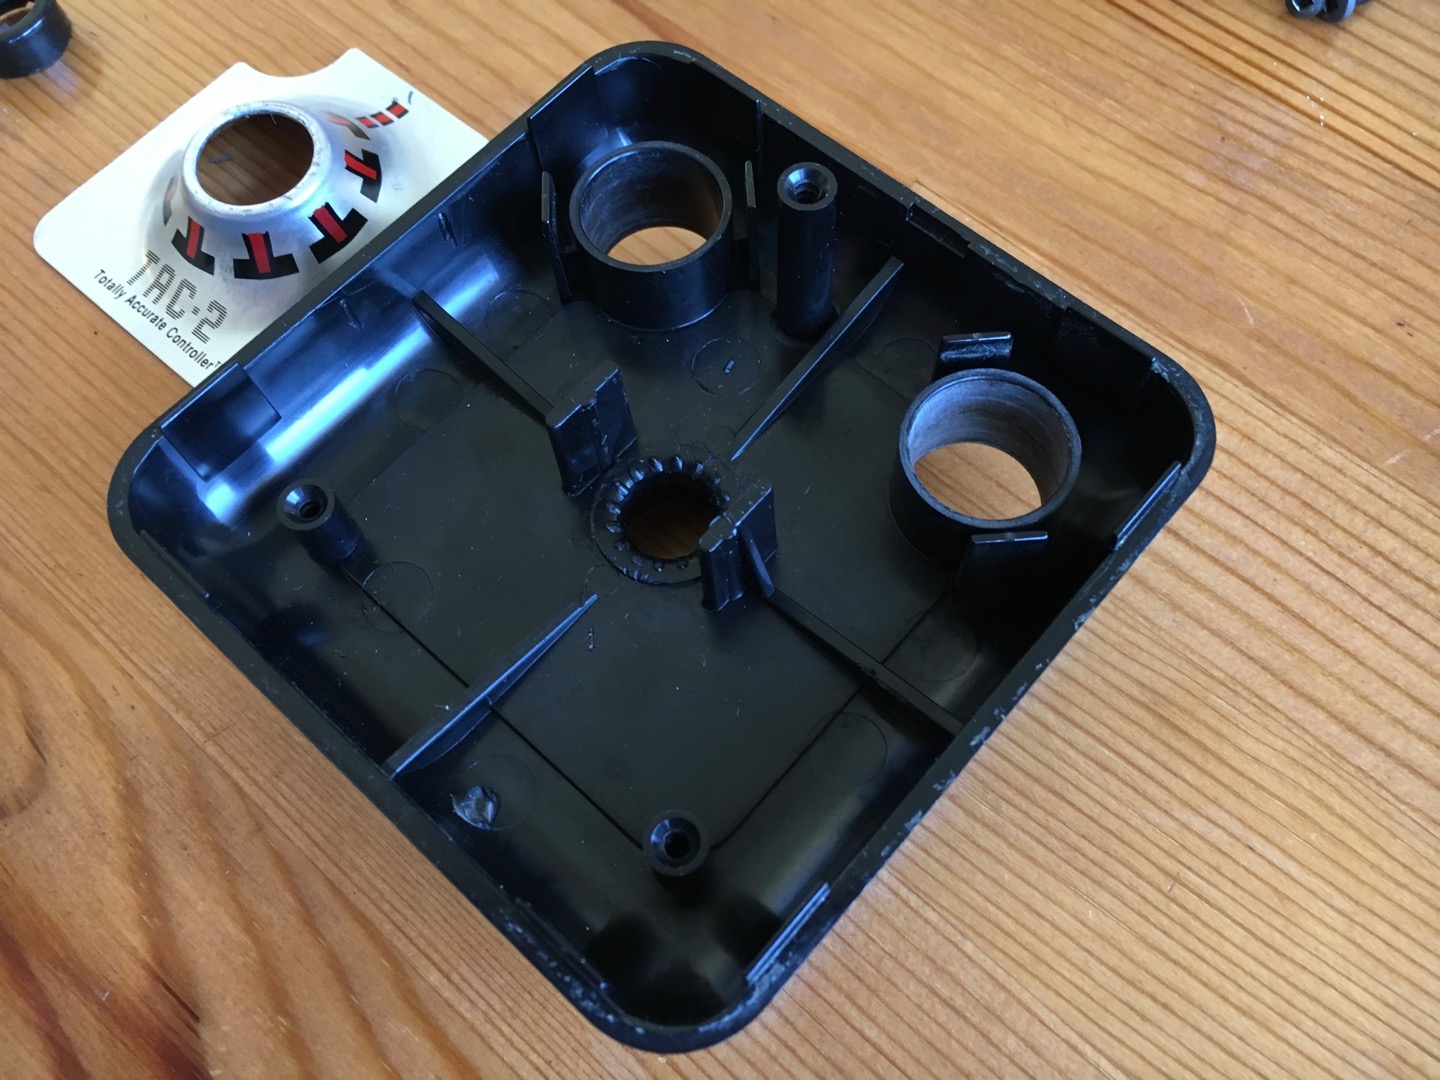
If you get the chance to try both models side-by-side, it’s quite obvious why the cost-reduced models are regarded as inferior. They have very little resistance on the stick, thus lacking the solid feeling that made the TAC-2s popular in the first place.
Looking inside the two black models, the reason for the aforementioned poor feel becomes rather obvious. The US models use a very dense black rubber bushing to pass the stick through the top casing, while the Chinese models have a softer gray rubber which is compressed by a steel washer.
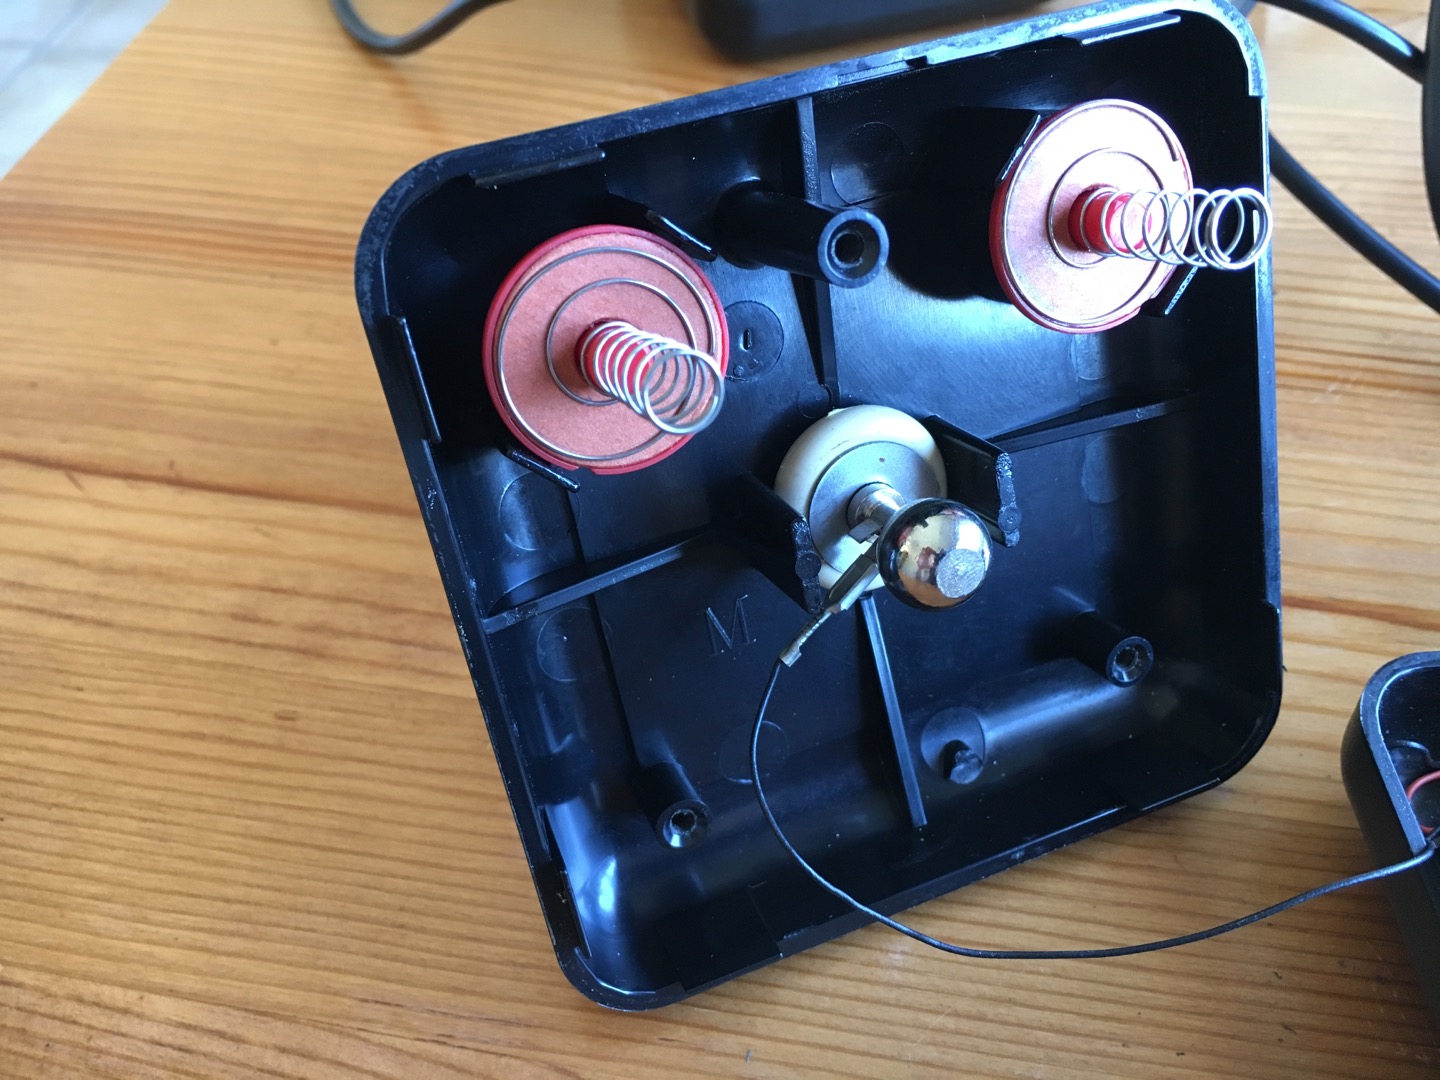
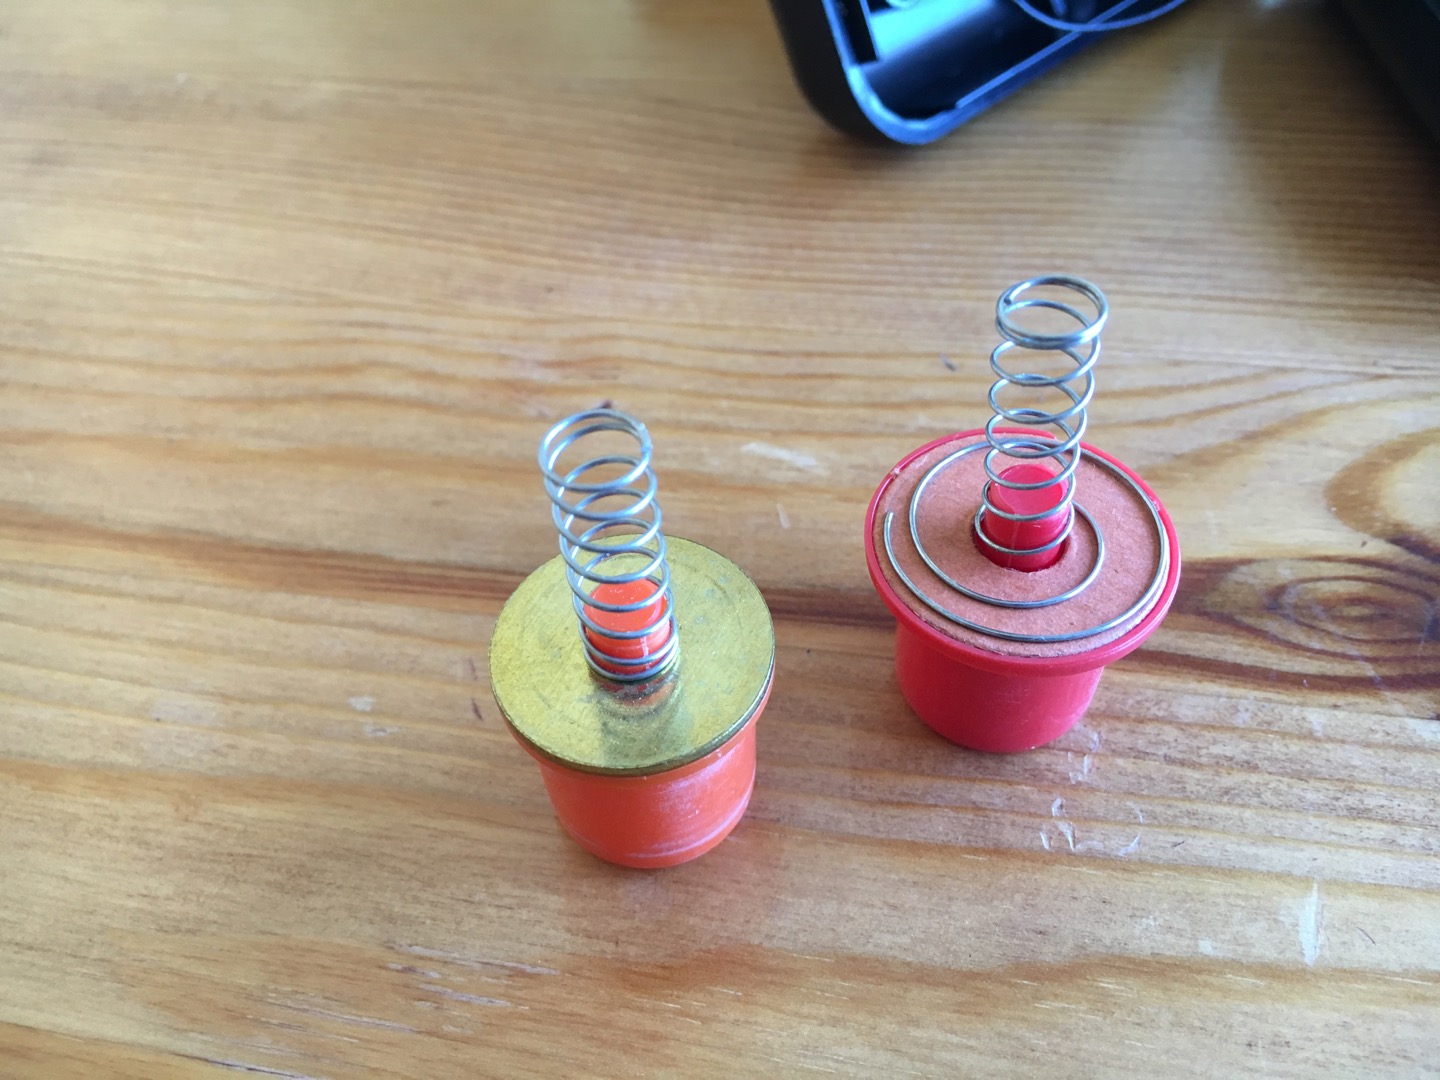
The fire buttons are also mechanically different, with the Chinese model omitting the heavy brass washer in favour of just a simple extension of the coil spring.
The beige special edition is mechanically 100% the same as the black US-manufactured model. The obvious difference is the color of plastic used for the casing, but it also has red fire buttons instead of orange.
Although the US-manufactured TAC-2s have gathered a reputation for being nigh indestructible, they do require some maintenance and occasionally even break. The most common problem is poor contact on the four cardinal directions or the fire buttons. Most of the time all that’s needed to fix the problem is cleaning the corrosion off the contact surfaces, the chrome ball at the end of the stick and the brass washers on the fire buttons.
Isopropyl alcohol usually works well for cleaning up the corrosion and spraying a small amount of contact spray (CRC, for example) will keep them from corroding soon again. If the contacts are really dirty and worn, it may be necessary to clean them up with sandpaper. Remember to polish the contacts with a super fine grit - rough contact surfaces can produce a “grinding” feel to moving the joystick.
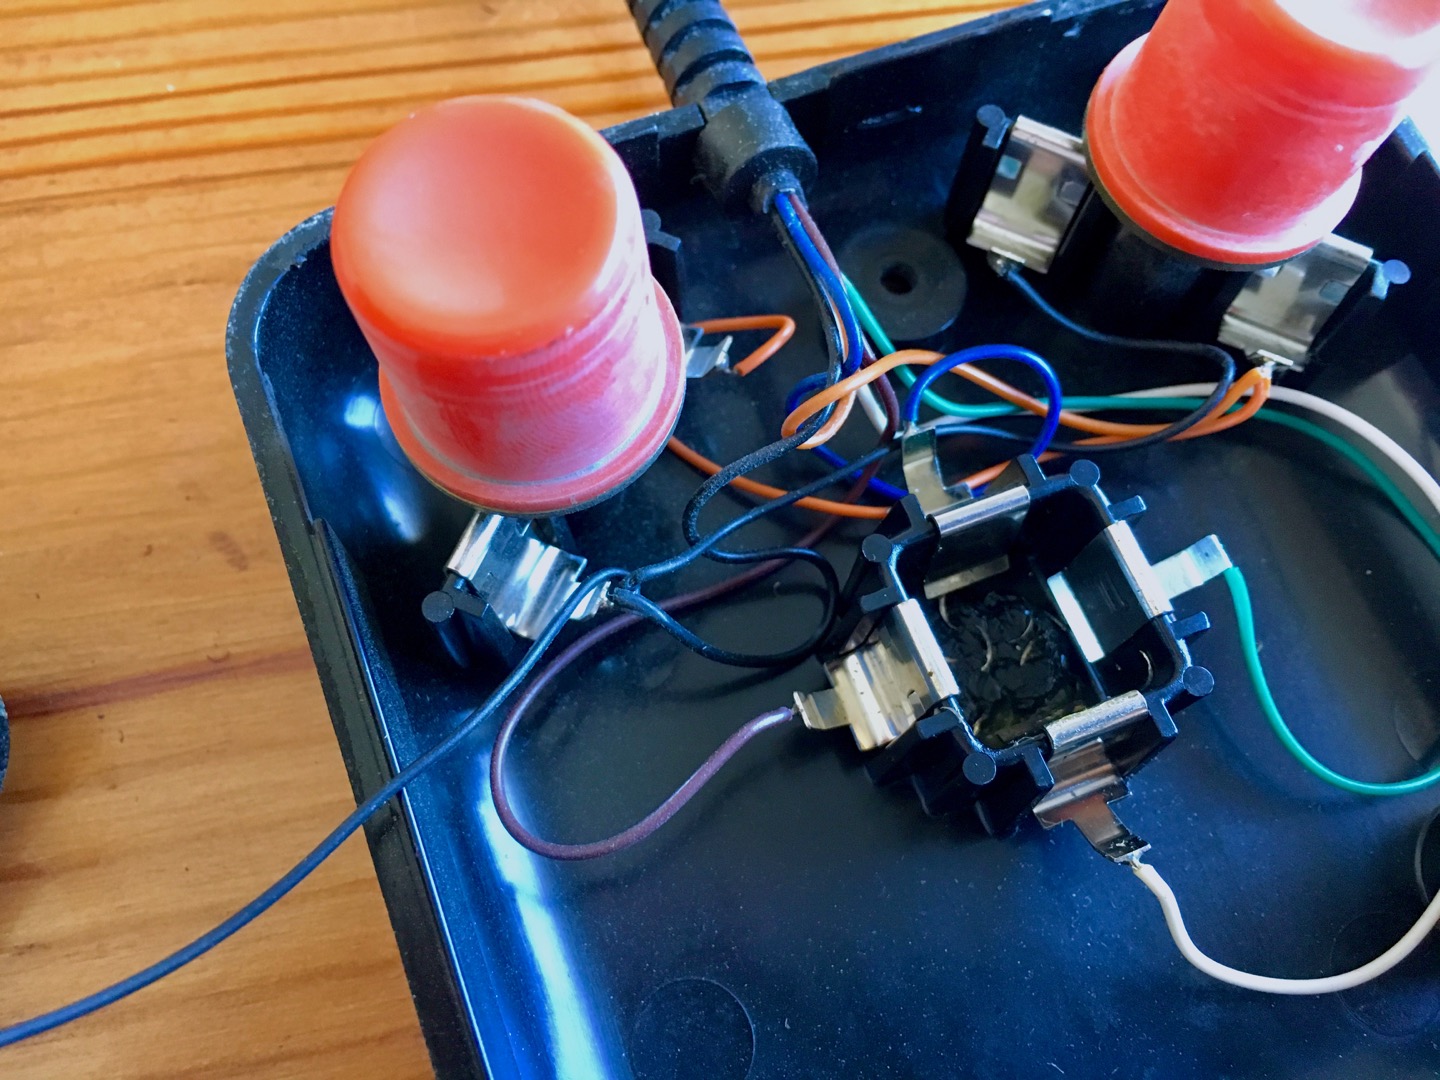
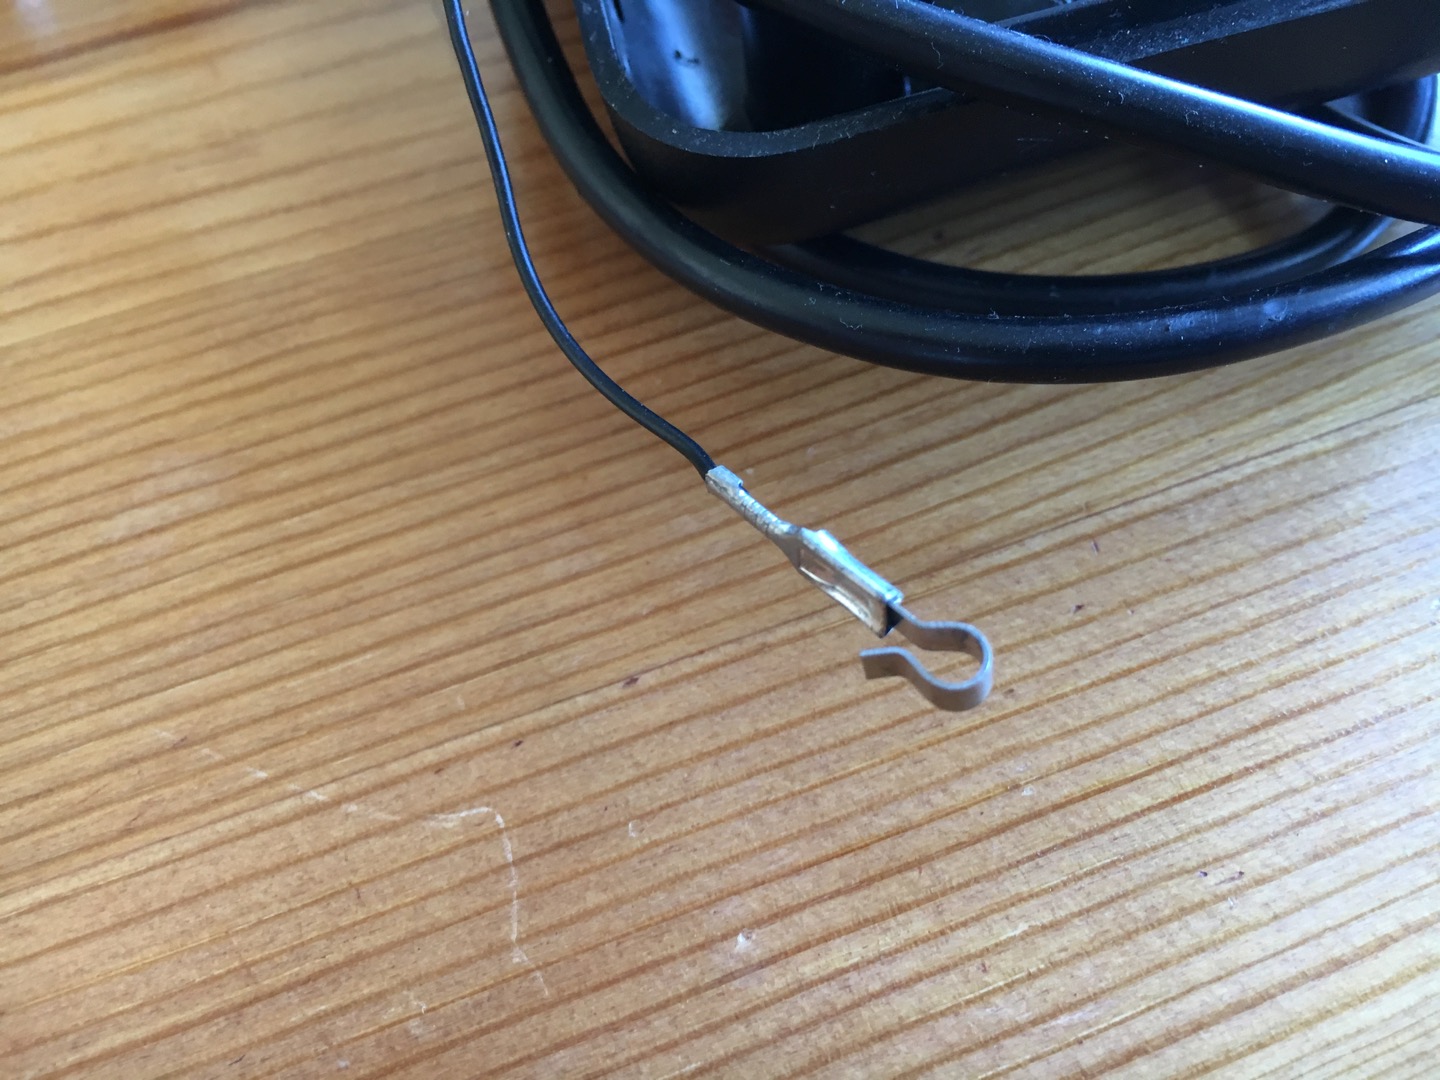
If all four directions fail to work properly, the problem is most likely with the ground wire that clips onto the base of the stick. Poor contact between the wire and the stick may cause intermittent problems and if the wire has completely separated from the clip, all four directions will completely fail to work.
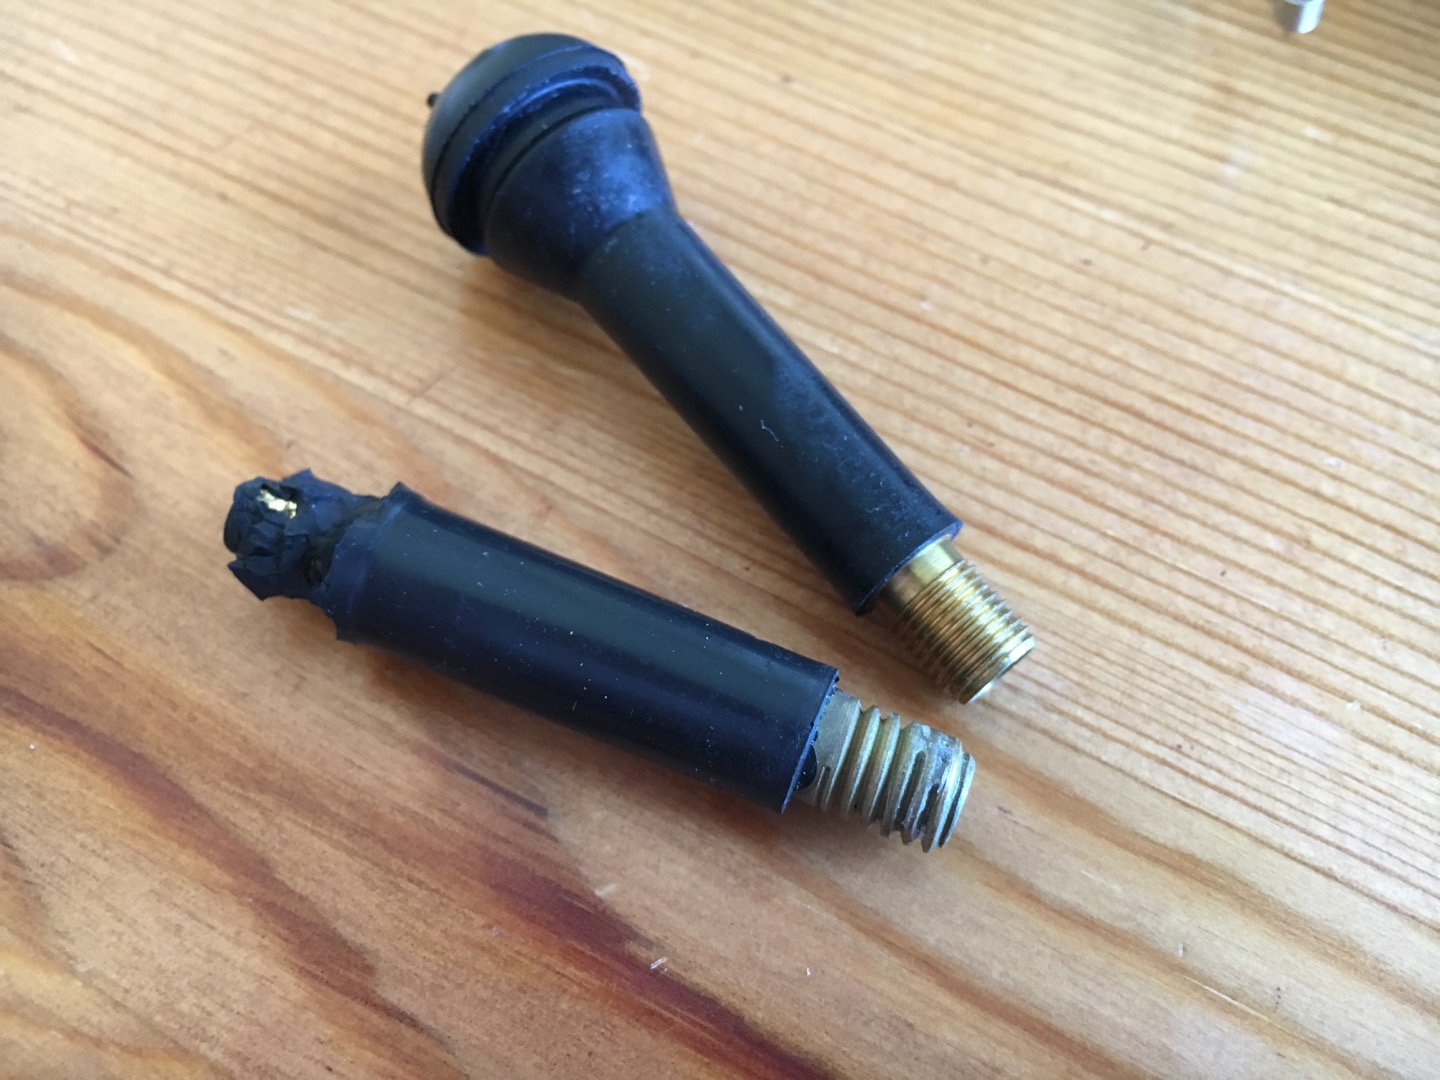
One of the the more severe failures is the chrome ball at the lower end of the stick breaking off completely. While fixing this problem requires a bit more work, it is absolutely not an impossible task. Surprisingly, it’s even possible to do it using brand new spare parts!
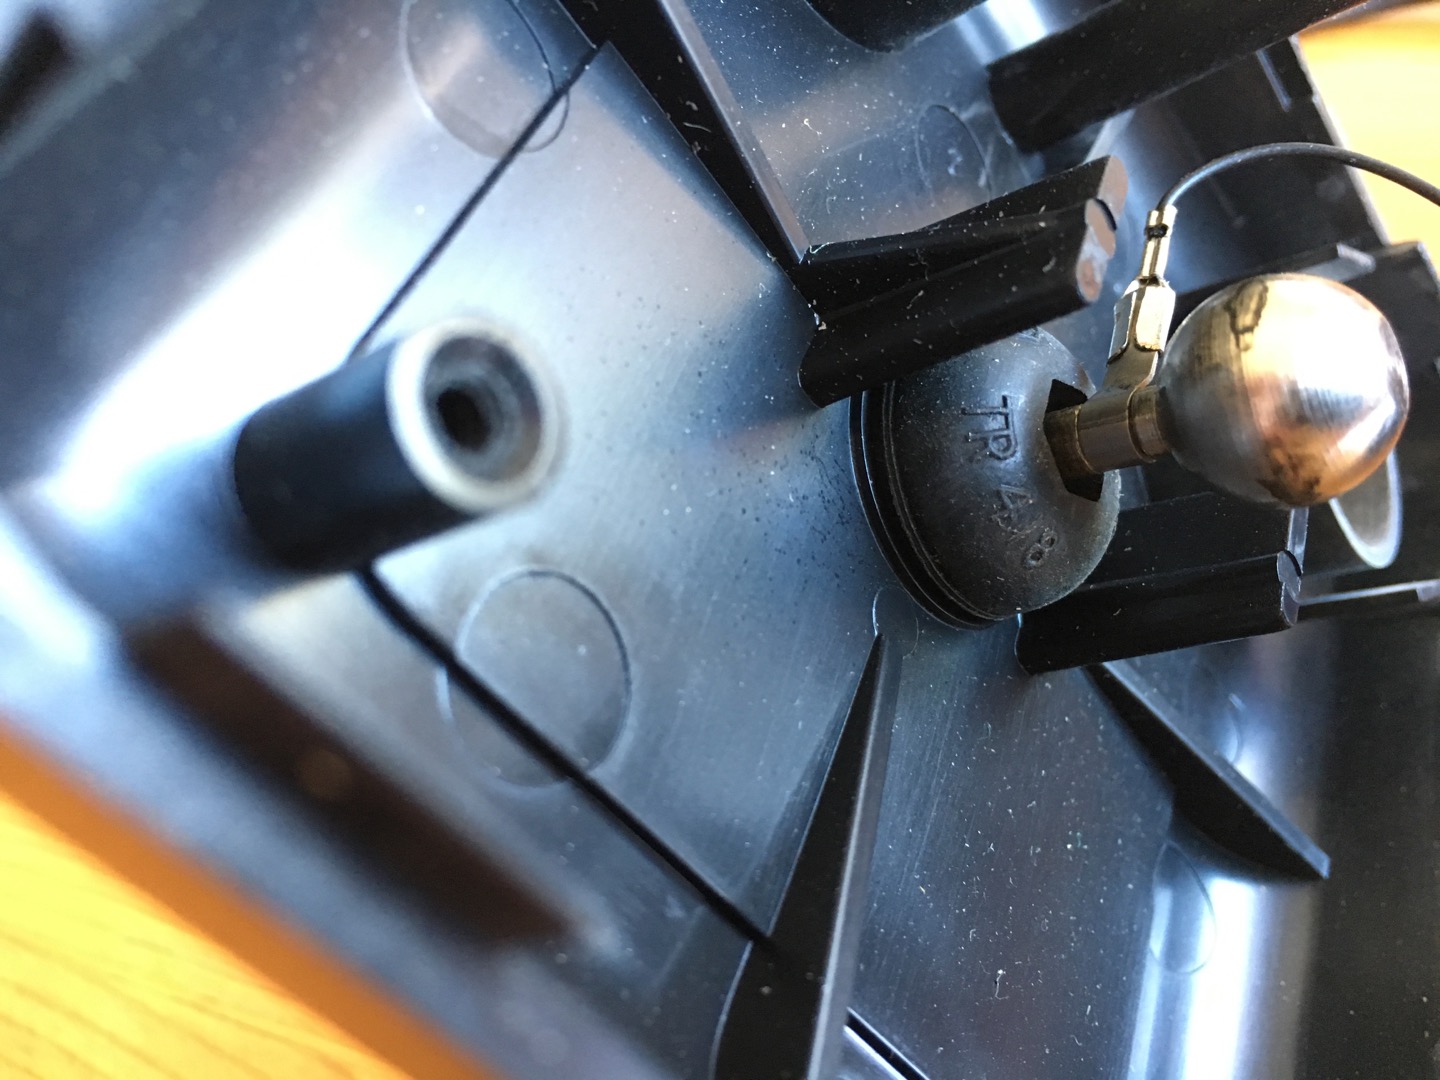
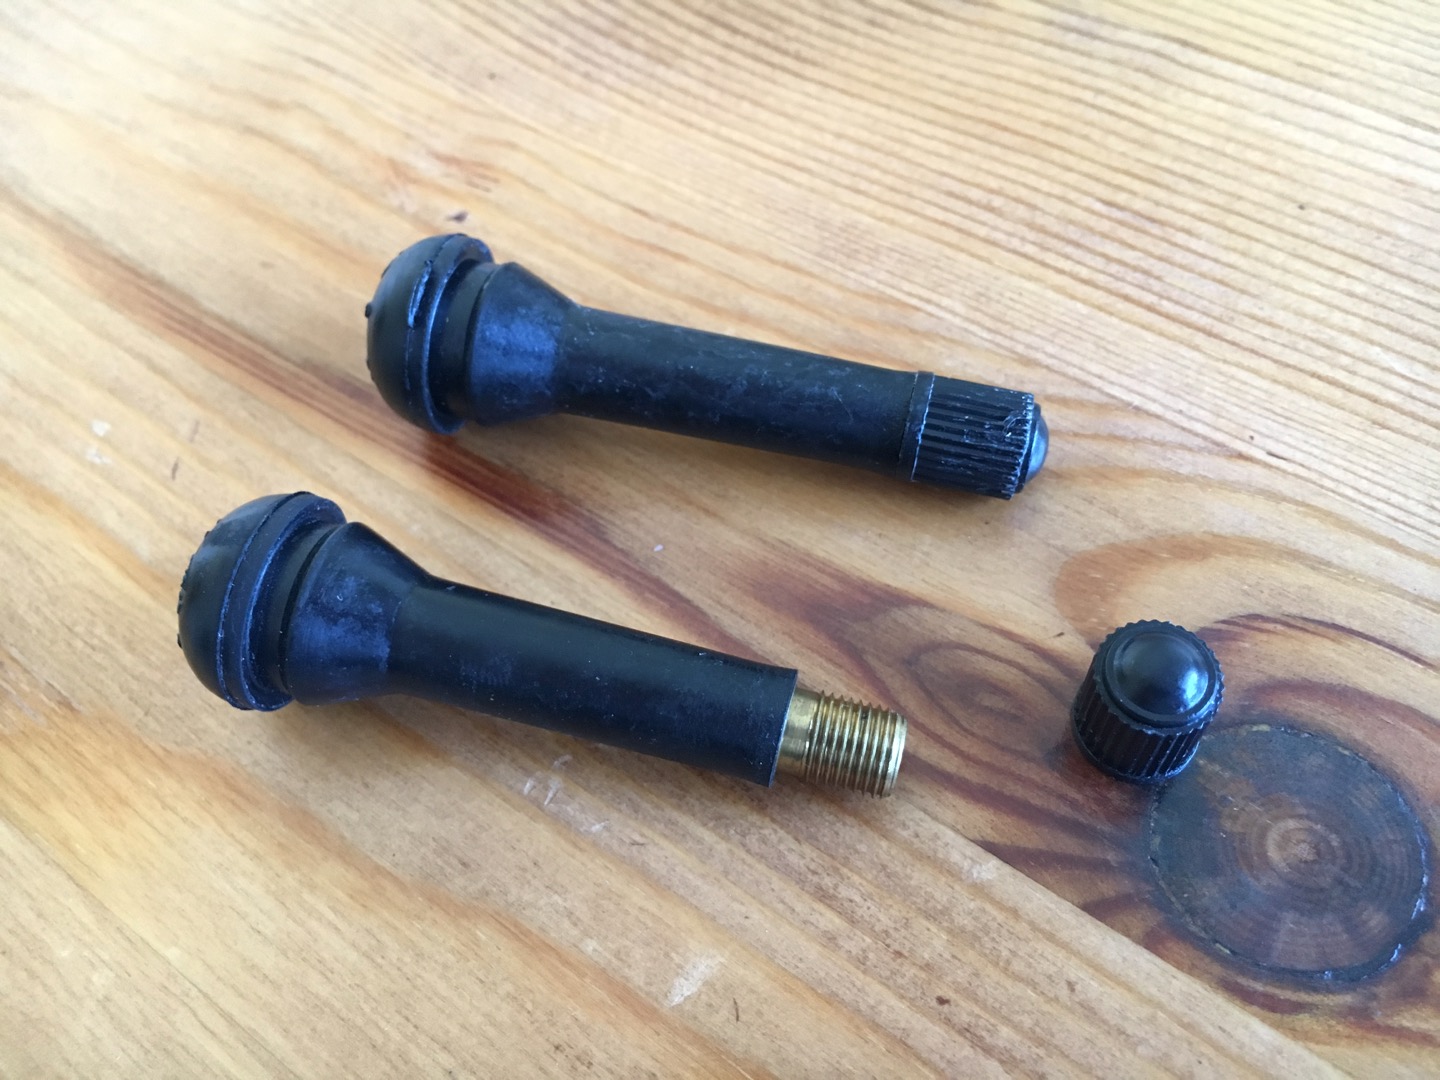
If you look at the black rubber bushing on the US models, you may have noticed the marking “TR418” on it. That’s not just some random marking left by the mould, but actually a part number for a Schrader-type valve stem used on tubeless automotive tyres!
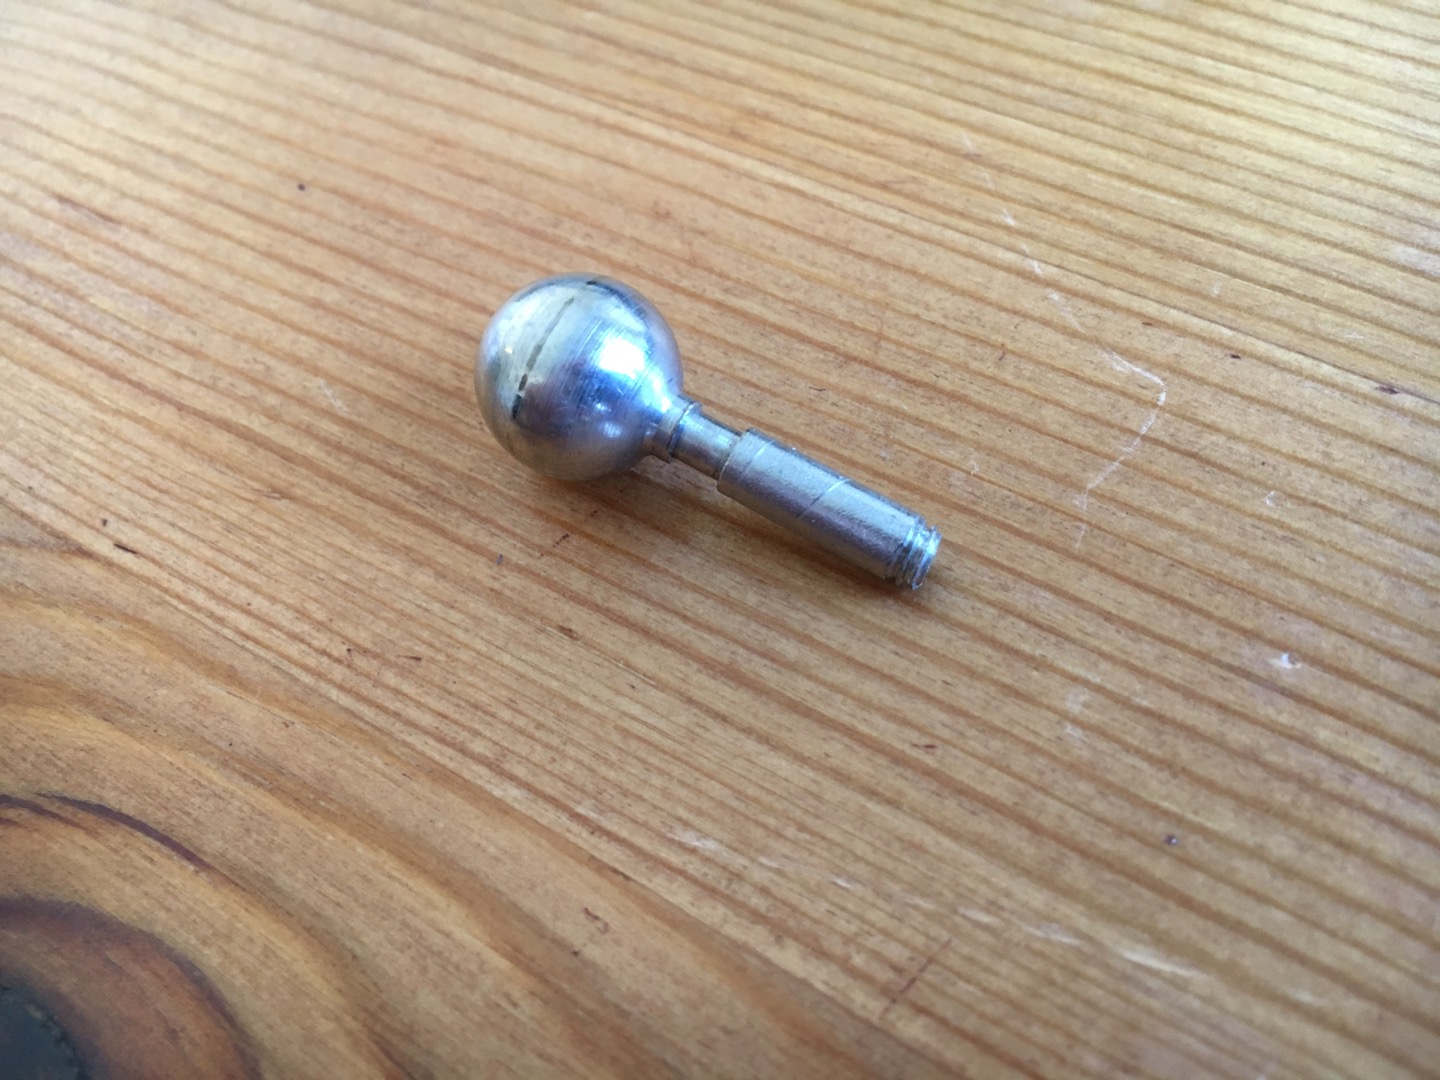
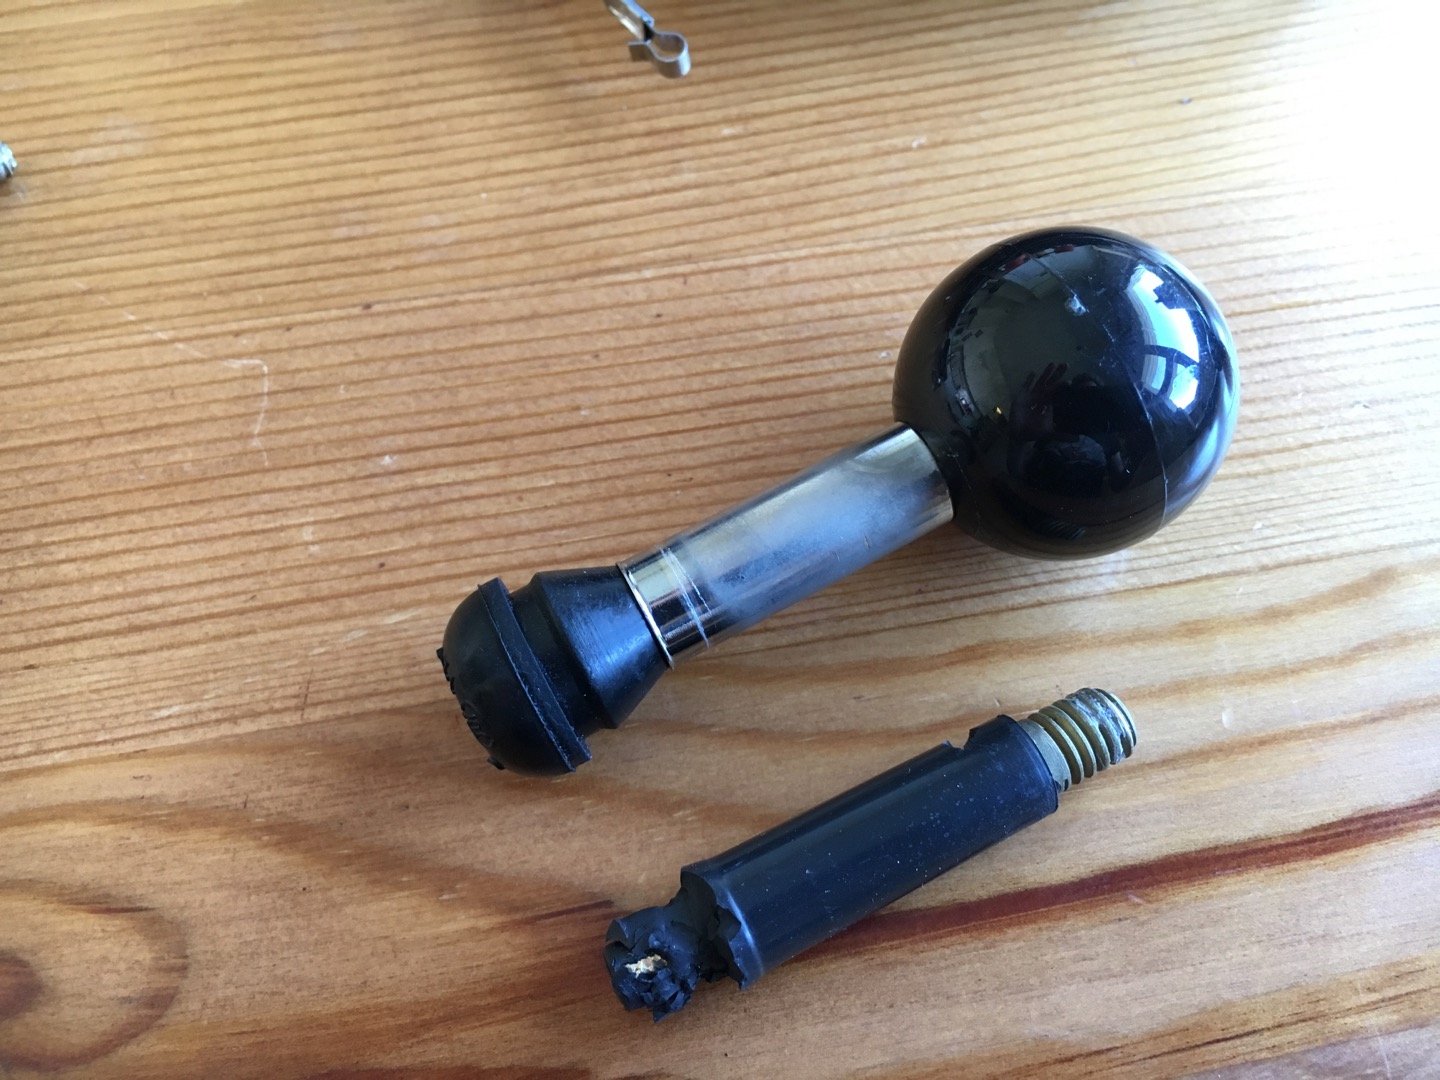
If you look closely at the photo of the broken off chrome ball, you’ll notice that it is actually threaded into the base of the valve stem. Similarly, the knob on top of the stick is threaded over the tip of the valve stem where the dust cap would normally go. I was unable to remove the original valve stem intact from my broken TAC-2, but it is still very much recognisable.
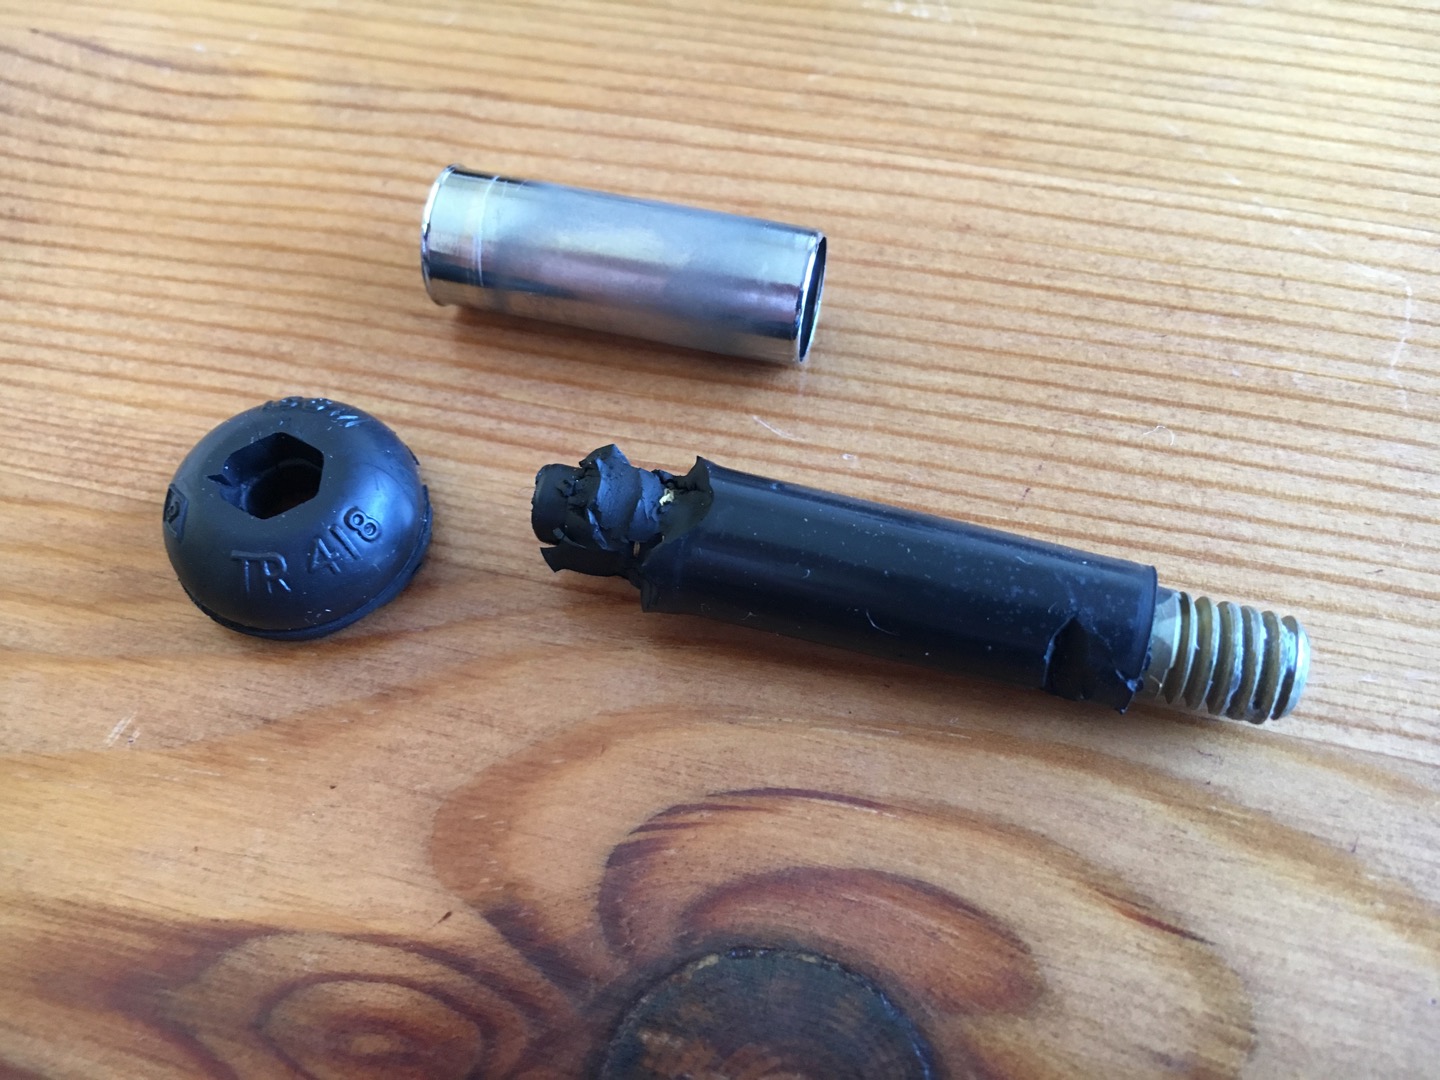
To appear as if the joystick uses a fully metallic shaft, the valve stem has a chrome sleeve pulled over the rubber nozzle which is what one would normally see on the outside of a car tyre.
I went to a local car parts store to pick up some brand new TR418 valve stems for comparison. The ones I found were just the cheap standard ones, but some specialty wheel shops have ones with a chrome sleeve fitted already as standard. Finding one of those would save the trouble of getting the original sleeve off the old stem.
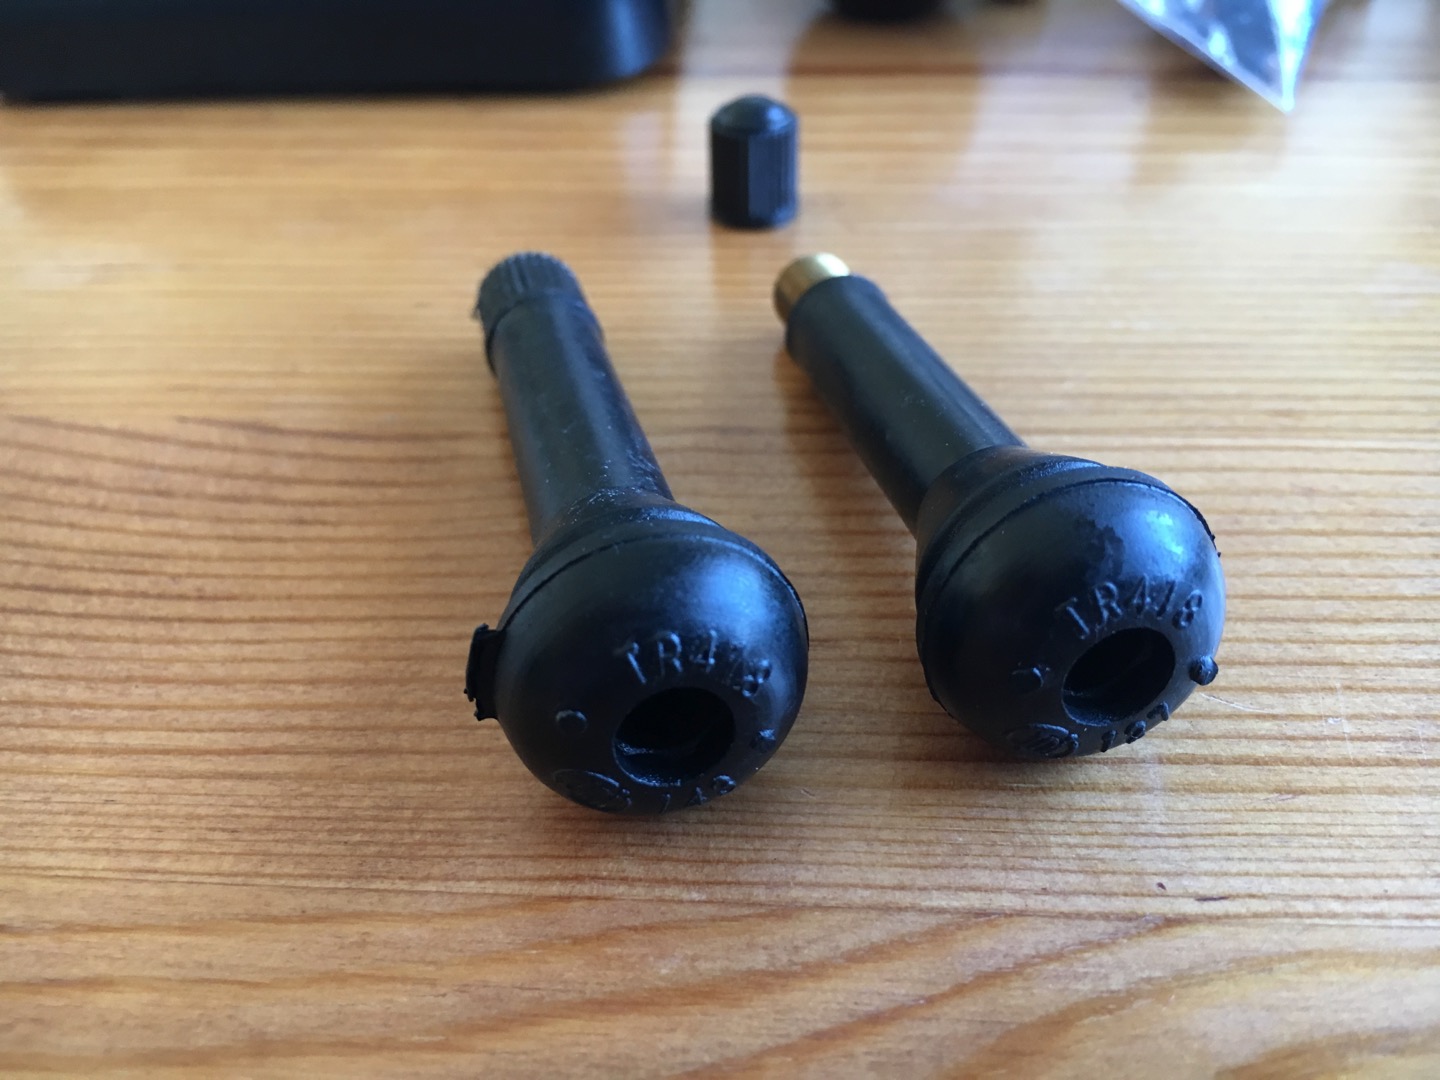
They look pretty much exactly the same length and the mounting is also identical. The thread on the tip of the valve, however, is different. The new valves have a standard 8x1mm thread, whereas the one on the joystick is a lot more coarse. Using a thread gauge, I was able to find out that the pitch is actually SAE 18 threads per inch.
Initially I assumed that I’d be able to use a thread die to cut new threads, but it may not seem possible. The valve stems used by Suncom appear to have been defect or unfinished blanks that have not been machined to take a standard valve core. Consequently, they have more wall thickness compared to the finished valve stems. Cutting new threads on the outside could either break through the wall or compromise the strength of the new part.

Despite the difference in pitch, it seems possible to attach the knob on the standard thread. The fitment isn’t perfect but it could potentially be enhanced by applying a thin layer of epoxy putty on the inside of the knob, threading it onto the valve and allowing the epoxy to dry.
Depending the manufacturer of the valve stem, the original chrome sleeve may either be just slightly loose or not fit at all. It would probably be more convenient to get a valve stem with a chrome sleeve preinstalled.
Now comes the hard part - if the original chrome ball snapped off the valve stem, it’s likely that there’s not enough thread left on it to attach it into the new valve stem. This means that a new part needs to be manufactured in a lathe. Once a new part has been made, the new valve stem needs to have threads tapped to the inside end of the brass tube. I’m currently working on getting some replacement parts made and will update on the project later on.