Fender “Classic Player 1959” - part 3: Pickguard, pickups and electronics

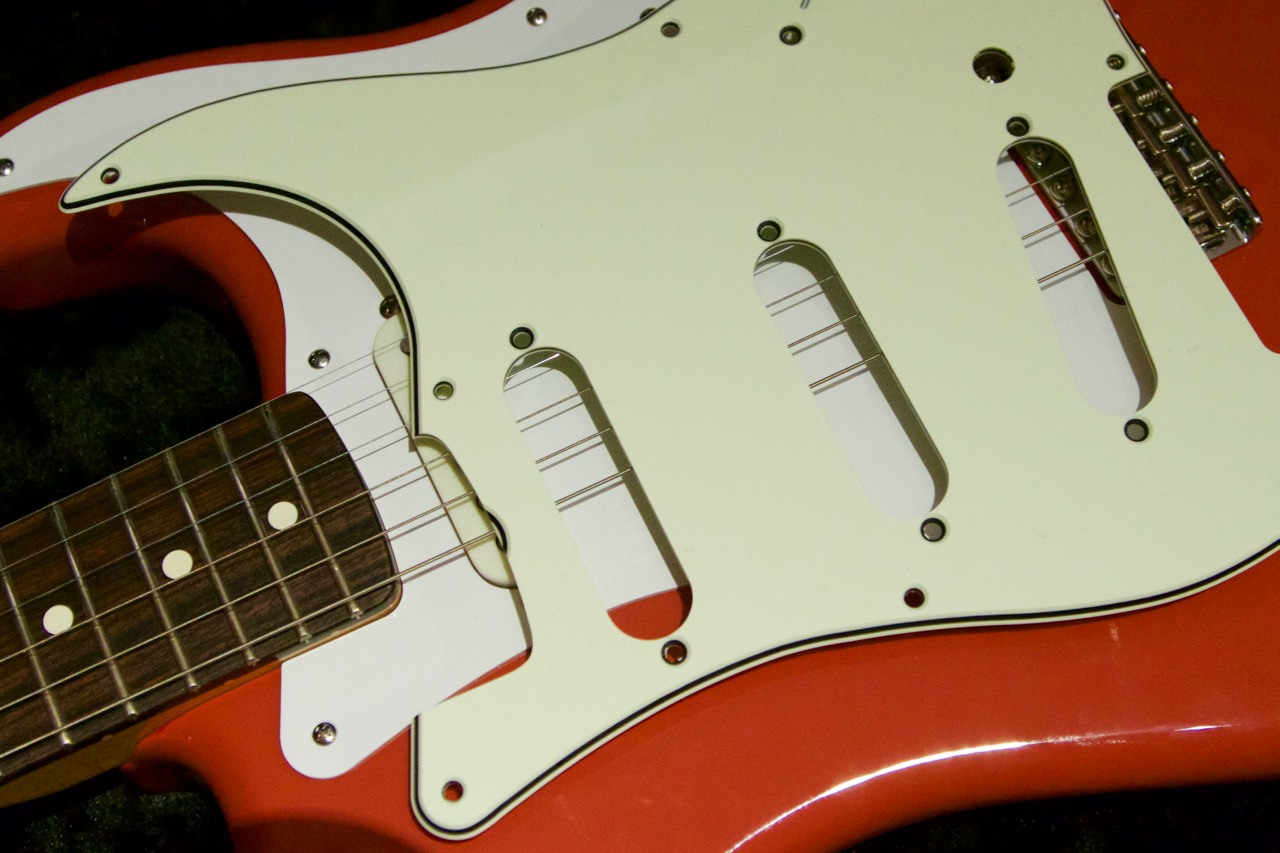
Finding a 8-hole 3-ply mint/black/mint pickguard which isn’t garishly green turned out to be harder than I thought. Although the Fender OEM ones have a nice colour, their ‘59 reissue pickguard uses the rather uncommon 10-hole pattern and would not work with an 8-hole body. GFS mint green is also reasonably subtle but they only have an 11-hole version.
Although all the hole patterns are more or less historically valid for 1959, I don’t really feel comfortable drilling extra holes to a brand new body and would rather stick with a pickguard that has all 8 holes in correct locations.
Fortunately, my intensive googling for pickguards finally paid off. A Japanese parts manufacturer called Hosco has vintage series pickguards which include a very nice ‘59 3-ply one (p/n VS-59STPG/MI) with an 8-hole pattern and even the the small cut below the neck to partially expose the end of the truss rod. Their description for the colour is"mint ivory" and it appears to be exactly the slightly yellowish pale green that I want.
Unfortunately, the pickguard was out of stock at a local reseller and had a 2-3 week delivery time so in order to not stall my project, I had to again borrow parts from my Squier. Don’t worry little Squier - you’ll get your pickguard back!
Choosing pickups turned out to be the most difficult decision of the project - there’s just such a crazy amount of various pickups out there to choose from. I know that I want to have that classic “stratty” quack, but would still like to get some modern features that help cut back on the inherent noise from single coil pickups.
I initially considered a set of the Fender Vintage Noiseless pickups, but their sound did invoke somewhat mixed feelings and apparently may also have fitment issues with vintage S/S/S routed bodies. My next candidates were the Custom Shop Texas Specials, which came as standard pickups on the Mark Knopfler signature Stratocaster. They do sound pretty sweet and while not actually noiseless, the RW/RP middle pickup helps to cut background noise on the “in between” switch positions.
None of my local shops had the Texas Specials in stock, but one did have a Seymour Duncan California 50s set, which consists of three SSL-1s, with the middle pickup being RW/RP. I really liked the way they sounded on various sound clips and they appeared to have consistently positive reviews. Although staggered poles might not be optimal with a 12" radius fretboard, I decided to go with the SSL-1s. Mind you, the Classic Player 60s does come from the factory with staggered poles as well.
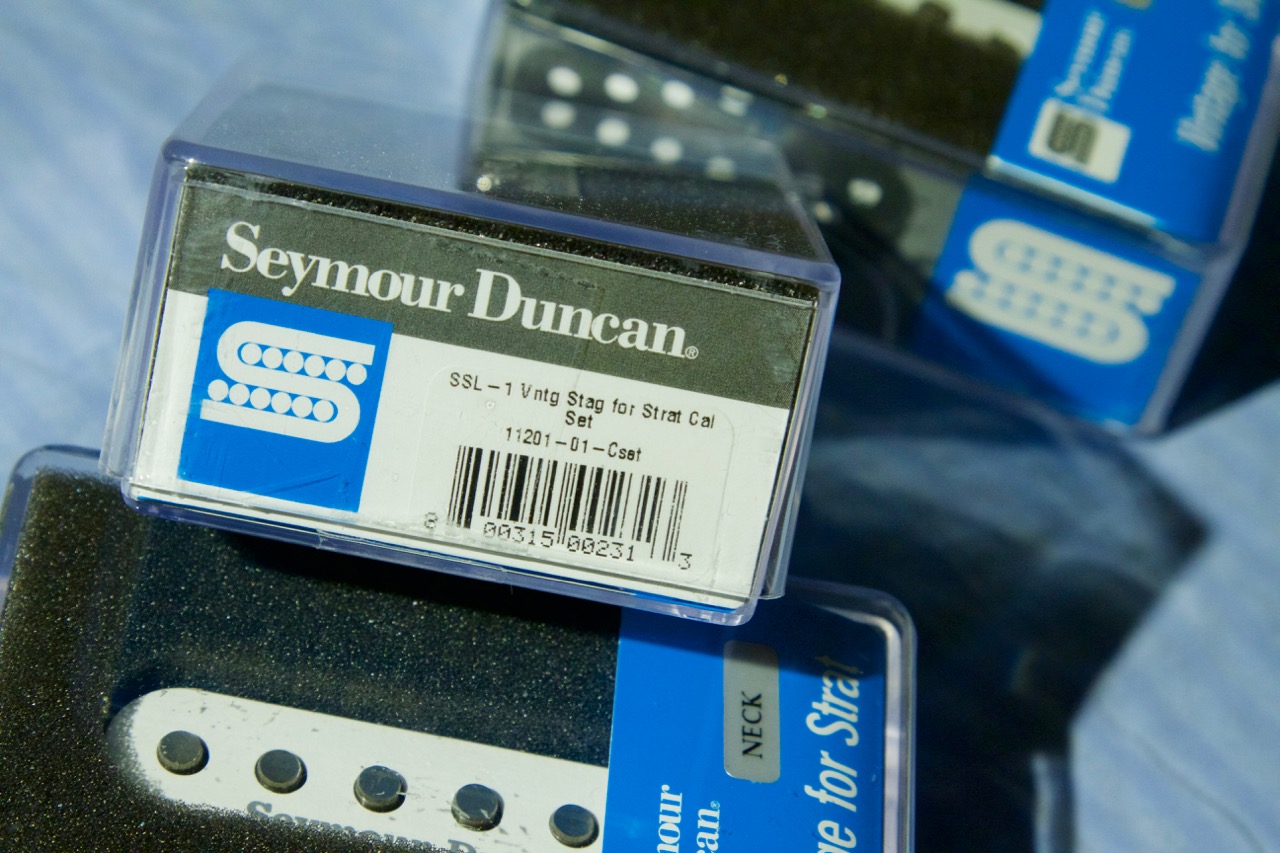
While the pickups include all the required mounting hardware, the accompanying screws have a flat bottom so they don’t really fit properly with countersunk holes. I had to get some oval head #6-32 screws for mounting the pickups. The selector switch had the same issue, so 8 oval head screws were needed in total.
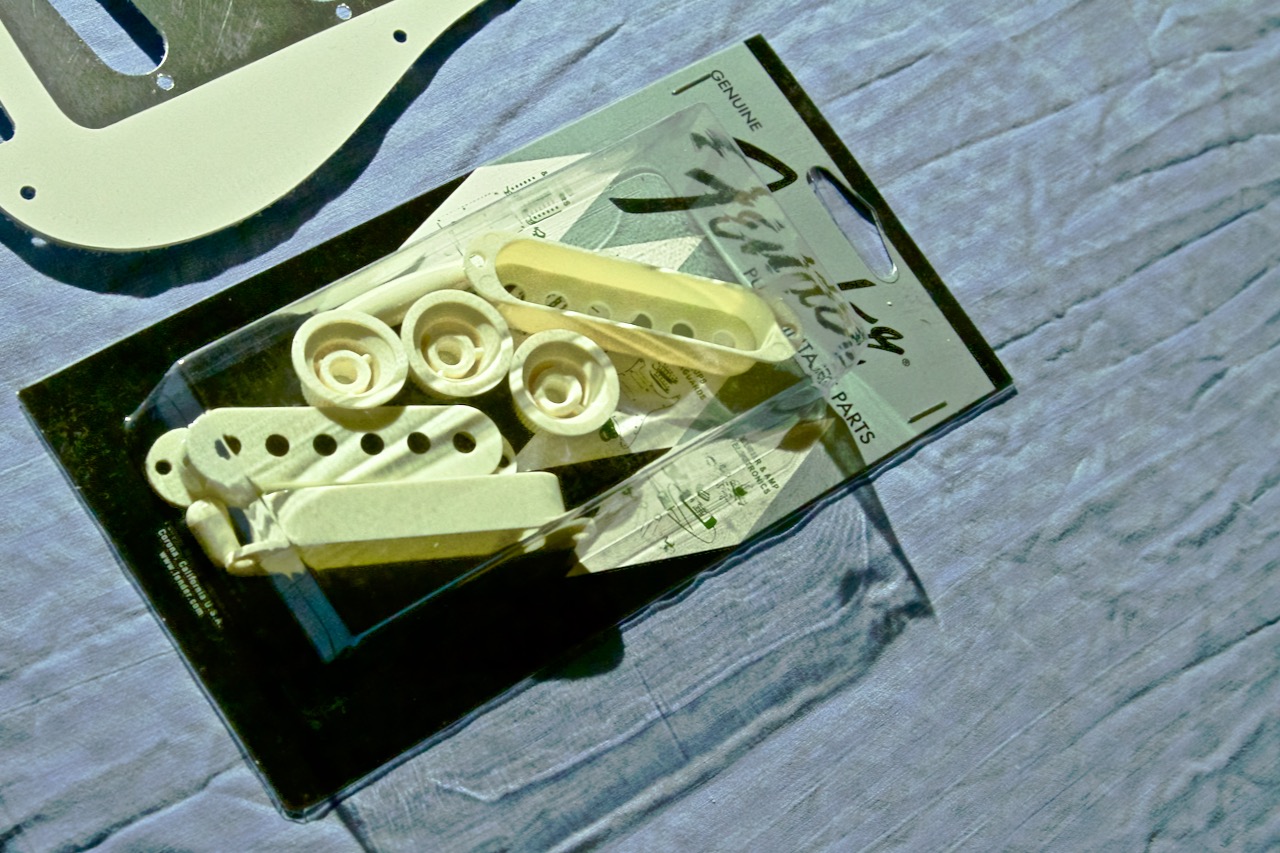
The SSL-1 pickups come with white covers carrying a Seymour Duncan logo, so I replaced them with plain aged white covers from a Fender accessory kit which also has a set of knobs and tips for the switch and tremolo arm. The pole spacing on the pickups is slightly wider but the covers do fit, albeit snugly. The mounting holes on the pickup are also spaced just a bit wider than the covers, so I had to slightly elongate the holes on the covers.
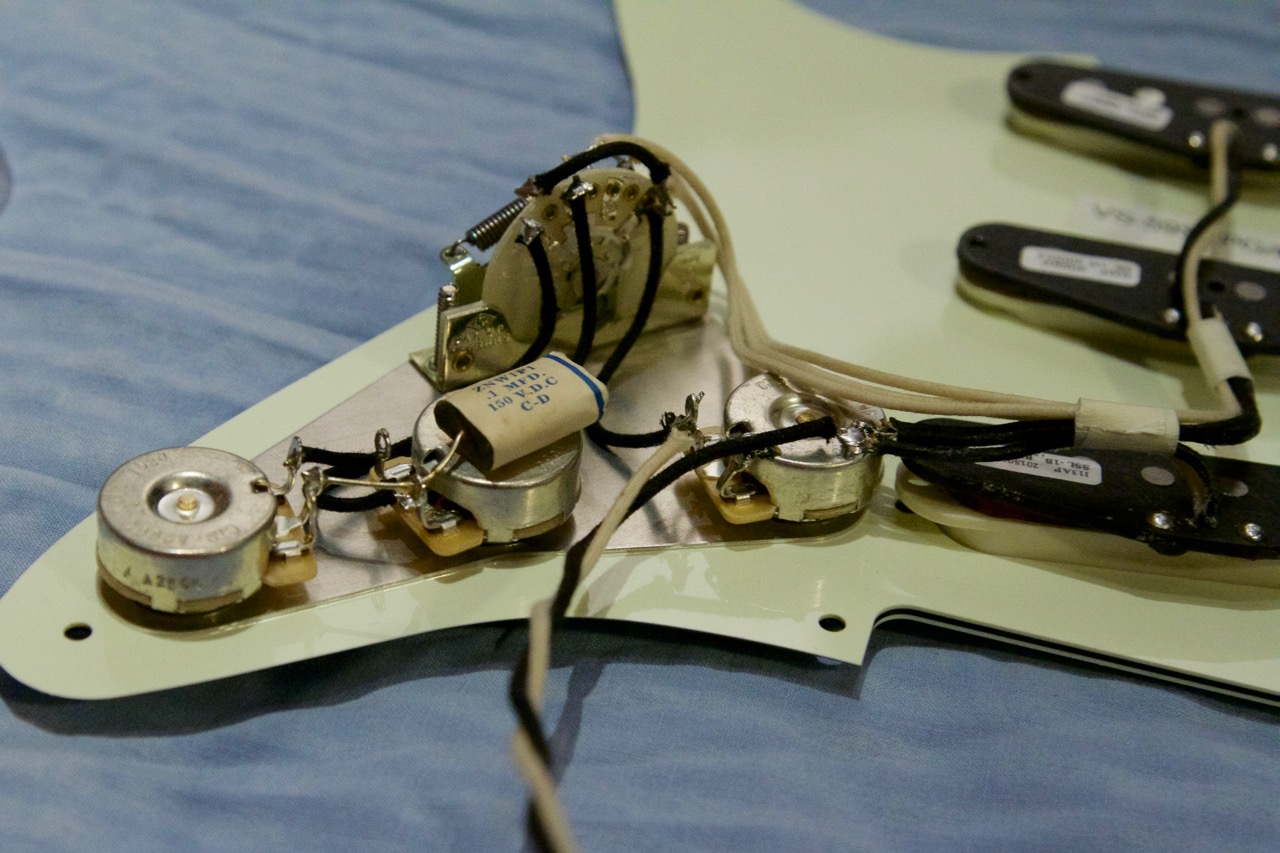
Everything else needed for the electronics comes from a Montreux kit which has three short shaft dish-bottom CTS A250K pots, a 5-way CRL USA switch, a 47nF Orange Drop capacitor, a Switchcraft jack and some cloth-insulated AWG22 wire. At least the pots and the switch are all pretty much the exact same parts you’d get if you purchased them individually in Fender packaging.
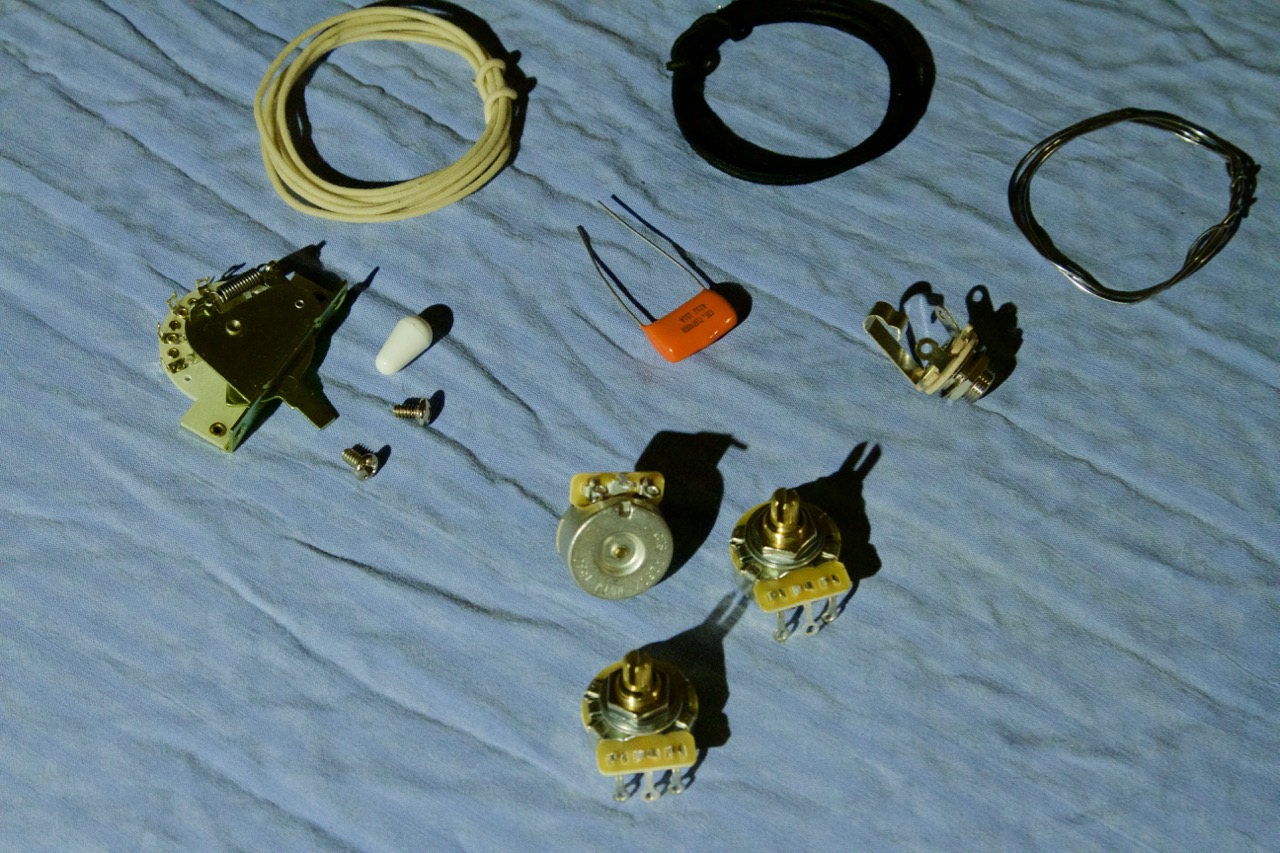
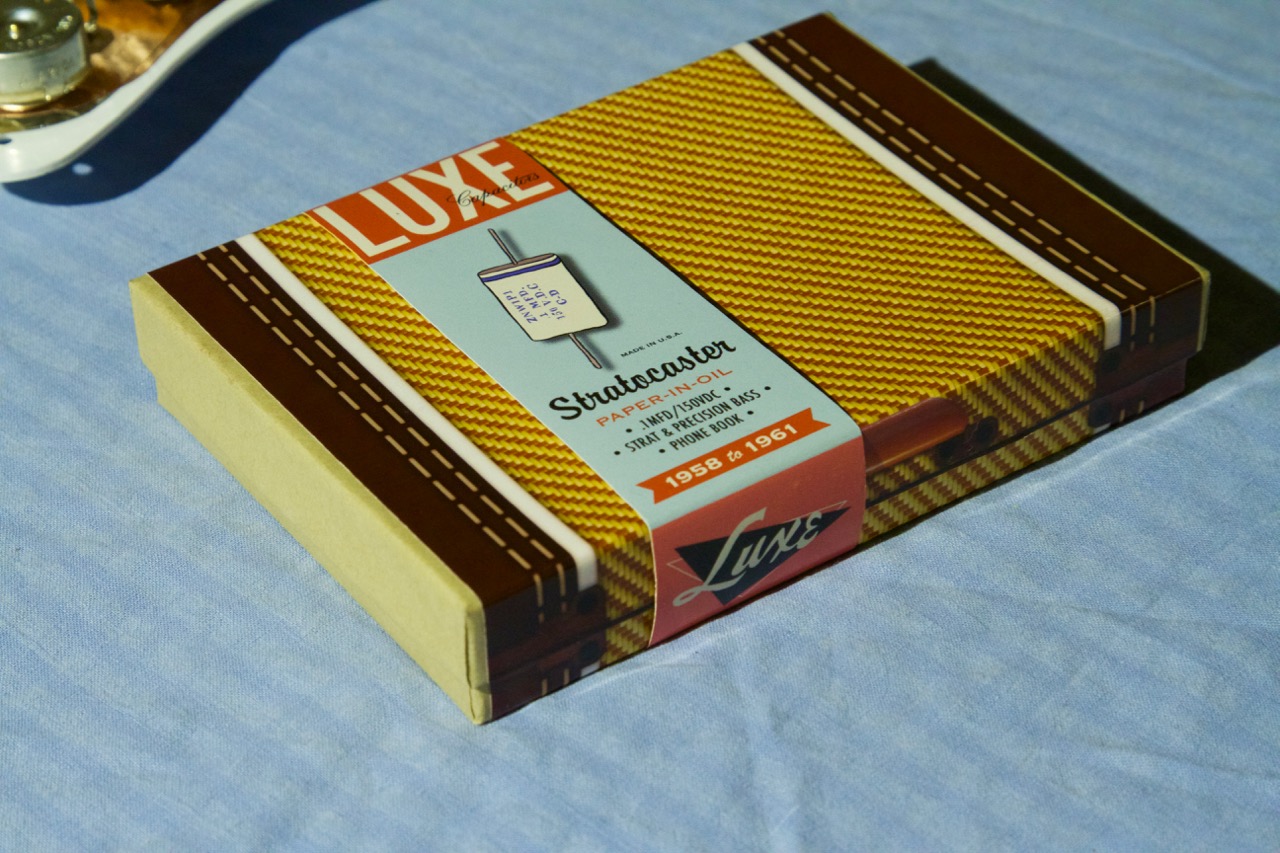
The Orange Drop will be going to my parts bin, though. I prefer to use a 100nF capacitor instead because it gives me a bit more range of adjustment on the tone pots. I’ve mostly used bog-standard 0.25€ polyester 100nF/63V capacitors but thought that this time I’d give one of those fancy paper-in-oil ones a try. I doubt it’ll sound that much different to my ear but having never seen one first hand, it should certainly be interesting at least.
I’m going to use the standard Stratocaster wiring on the guitar. It is, after all, the “baseline” setup which is familiar to use and a good place to start with. From there, I can go and try various other wiring schemes later if I feel like it.
The vintage S/S/S route doesn’t have too much extra space, so I cut all the wires to correct length. Either the cloth insulation is inherently difficult to work with or my wire strippers are just plain bad because I had to carefully trim stray threads with an X-Acto knife prior to soldering each wire. A bit of extra work, but all the wires eventually turned out OK.
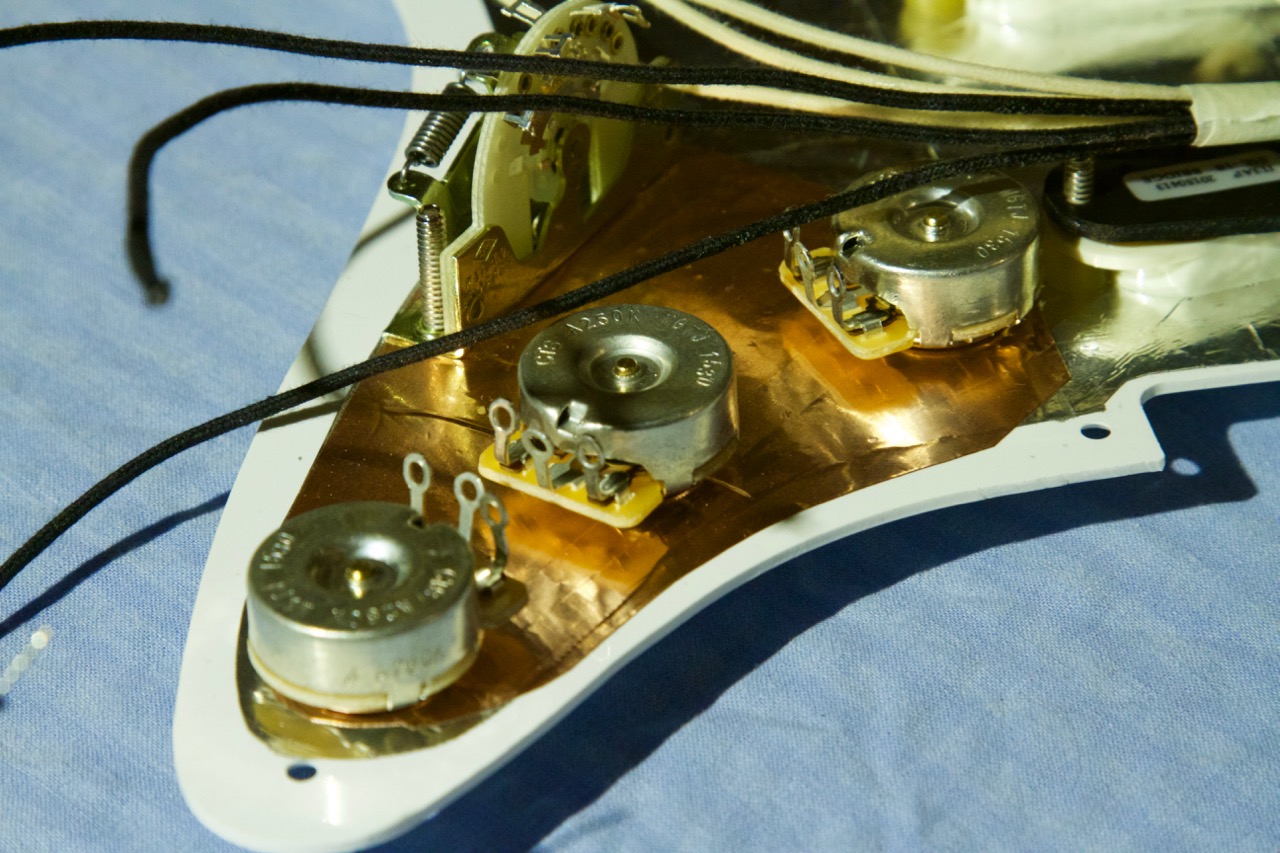
I soldered the capacitor on top of the center pot as I’ve seen them usually mounted in actual vintage guitars. There seems to be enough clearance in the control cavity to do this. However, the pots I have are very short and sit right against the inside of the pickguard.
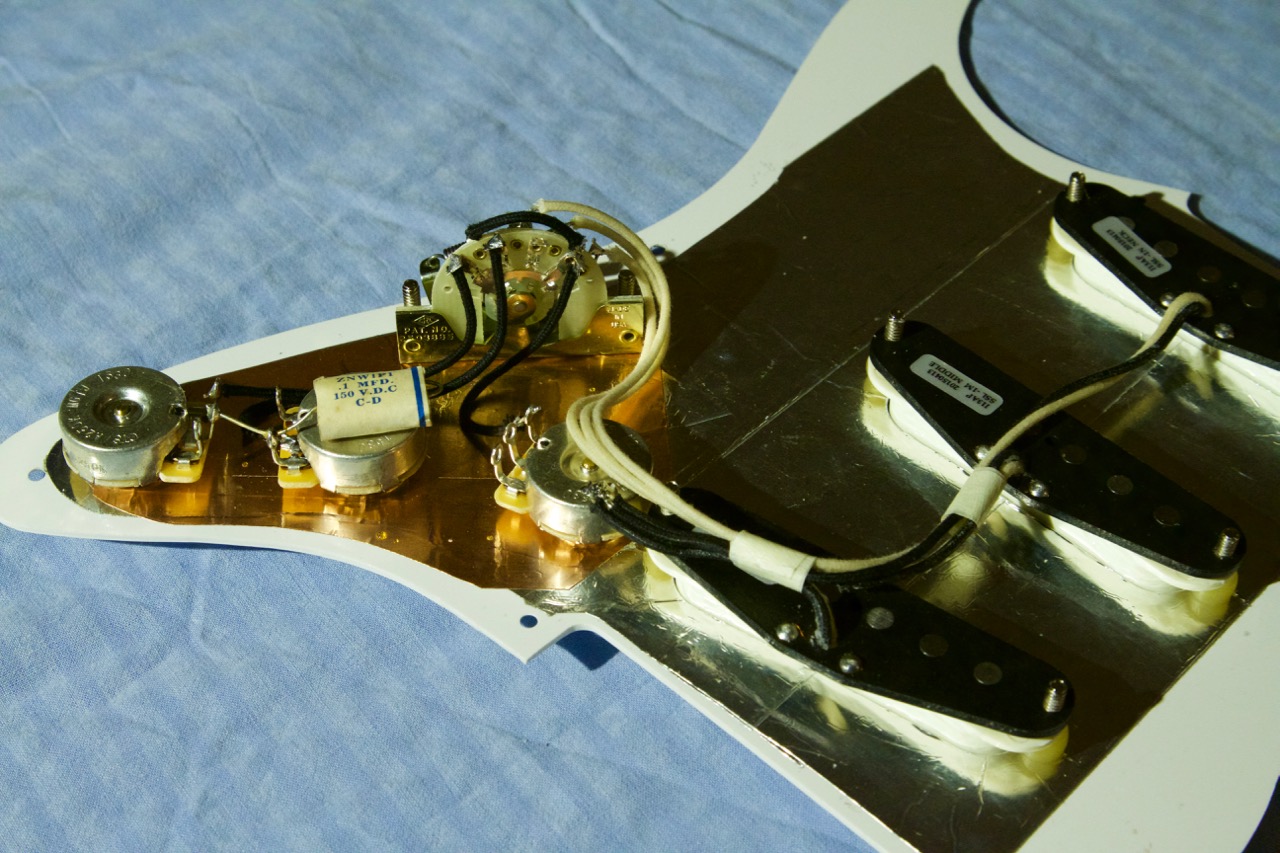
Once the wiring on the pickguard is complete, I connected it to the output jack on the guitar and while plugged into an amp, did a quick “screwdriver tapping test.” That immediately revealed that I had forgotten to solder one of the volume pot terminals to the ground. However, once that was fixed, all switch positions connect to the correct pickups and each of the three knobs perform as expected. Hooray! Now I just need to wait for the rest of the parts.
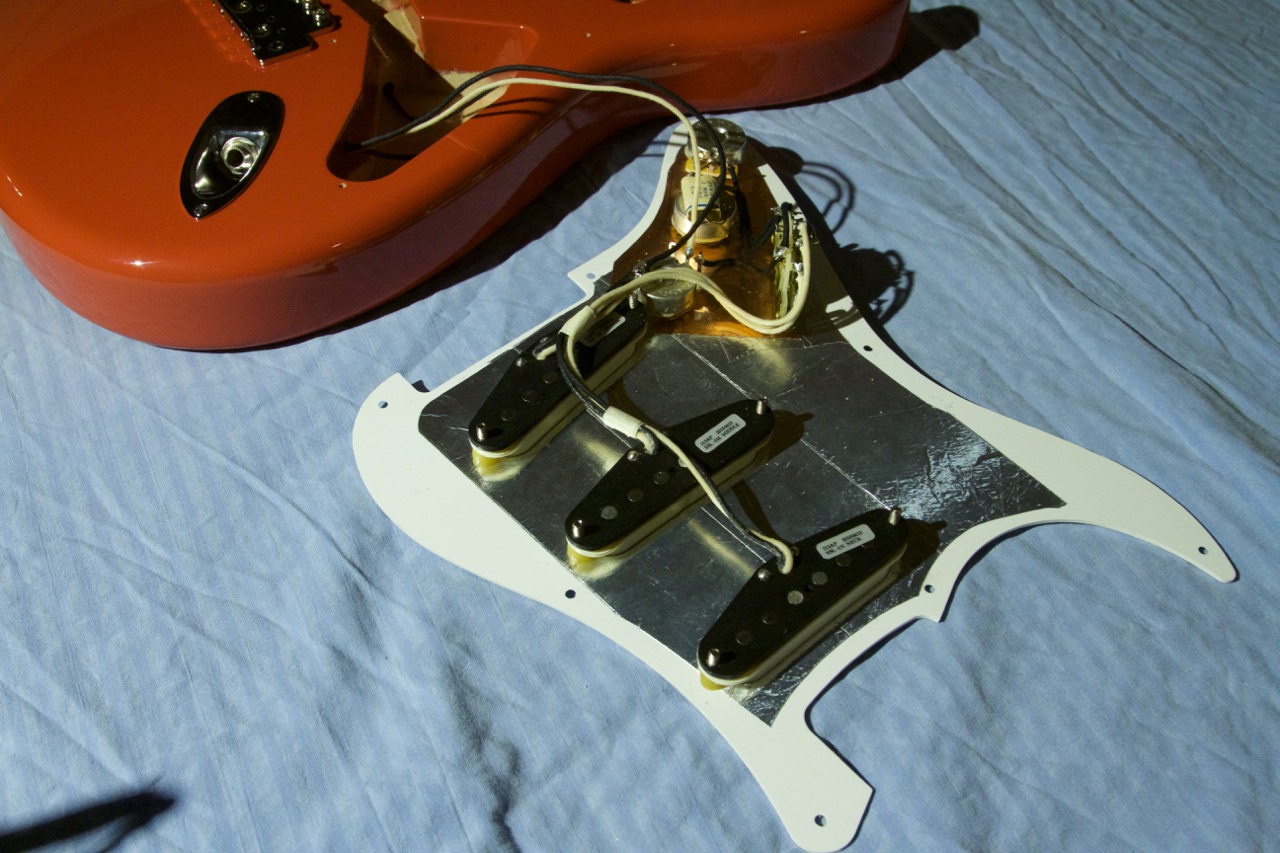
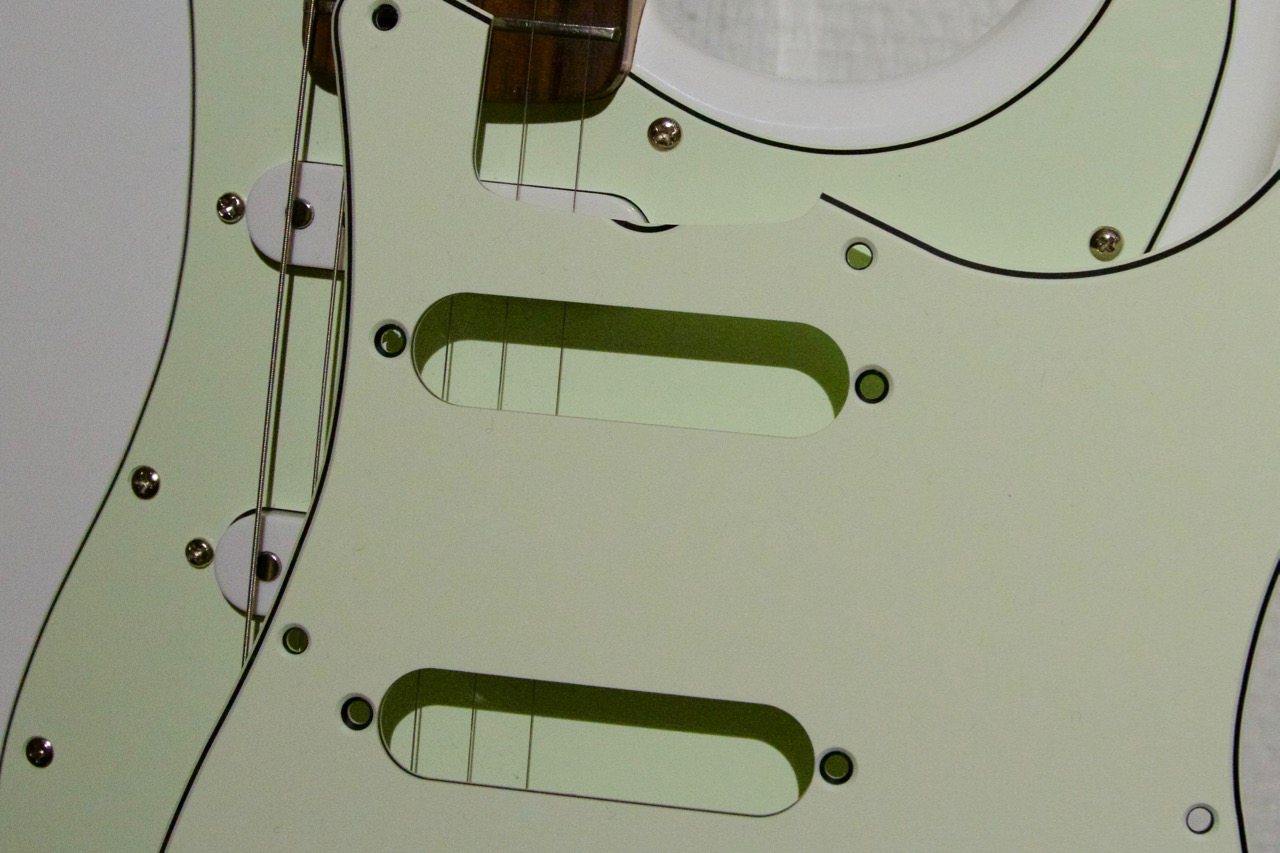
Fast forward a few weeks and I have the rest of the required parts, including the pickguard. Being impatient, I had also put on some strings to get an initial feel on what needs to be set up. Before I started replacing the pickguard, I did a few colour comparisons against the pure white 1-ply and a GFS mint green on my other Squier.
The whole electronics package can simply be lifted off from the “surrogate” pickguard to its final position. Due to the Hosco pickguard not having any shielding applied at the factory, I used a small 50s style aluminium shield plate under the controls. I’m also almost out of copper tape, so I’m going to have to do a full shielding of the pickup and control cavities later on. The finish and fitment on the Hosco pickguard is excellent and all the holes and edges align perfectly with the body.
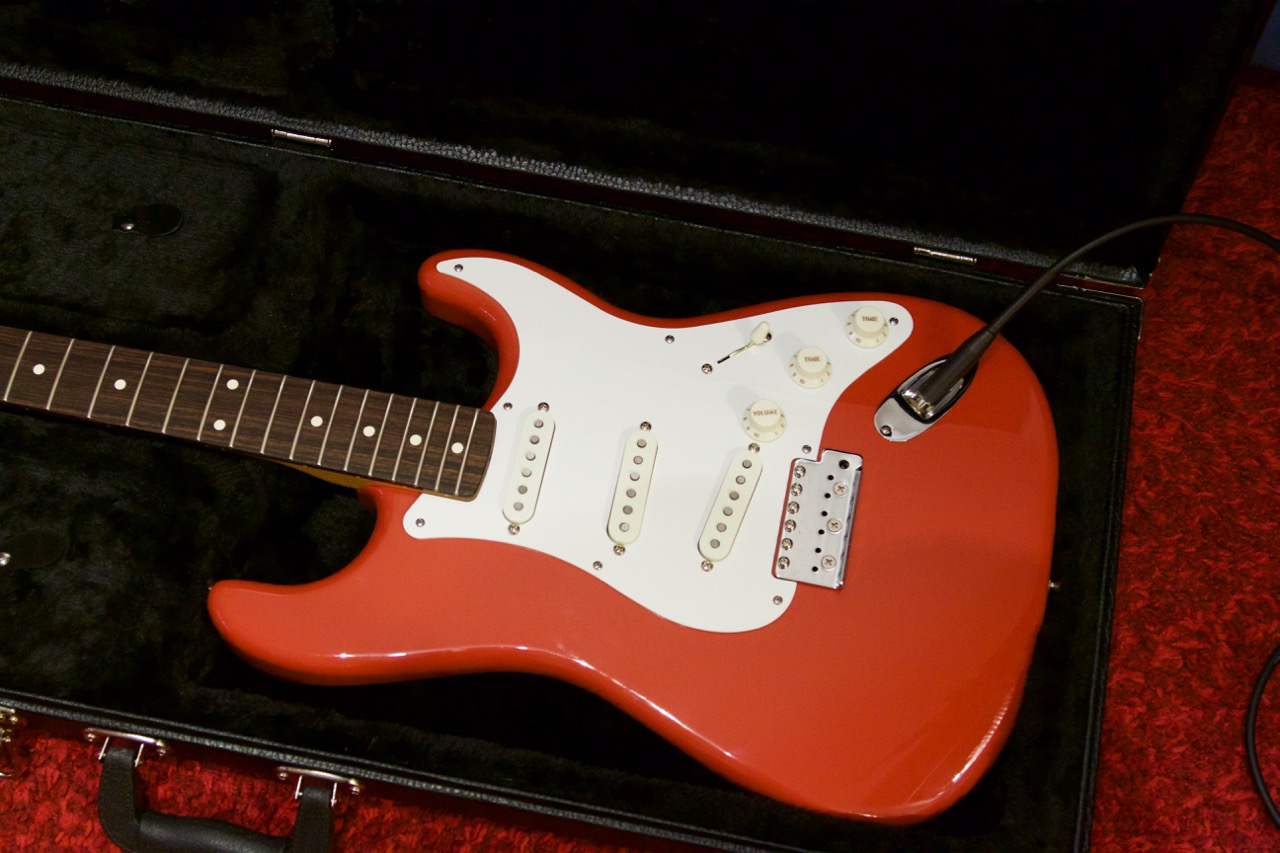
With the guitar fully assembled, the only thing that needs to be done now is a final setup!